Integrate Loop with Tailor Platform
Overview
Loop is a leading platform designed to simplify returns and exchanges, helping merchants streamline the post-purchase experience while reducing the operational burden of managing returns.
The integration of the Tailor Platform with Loop enables businesses to synchronize orders and product catalogs for efficient return processing. It also allows automation of key tasks such as return approvals, shipping label generation, and restocking, significantly saving time for merchants.
Tailor Platform Triggers
You can integrate Loop with Tailor Platform using triggers. Refer to executor service guide to learn about different types of triggers.
Connect Loop
This integration guide will walk you through the steps to set up a connection between Tailor PF and Loop.
1. Get the API key
Before you can begin integrating the Tailor Platform with Loop, you'll need to get an API key.
To get your API key, follow the below steps:
- Create an account with Loop
This is a prerequisite to access the Loop admin portal.
- Connect your store (e.g., your Shopify store)
Integrating your store is essential for managing returns through Loop.
- Set Up Return Portal URL
This URL is essential for directing customers to the correct page for processing returns.
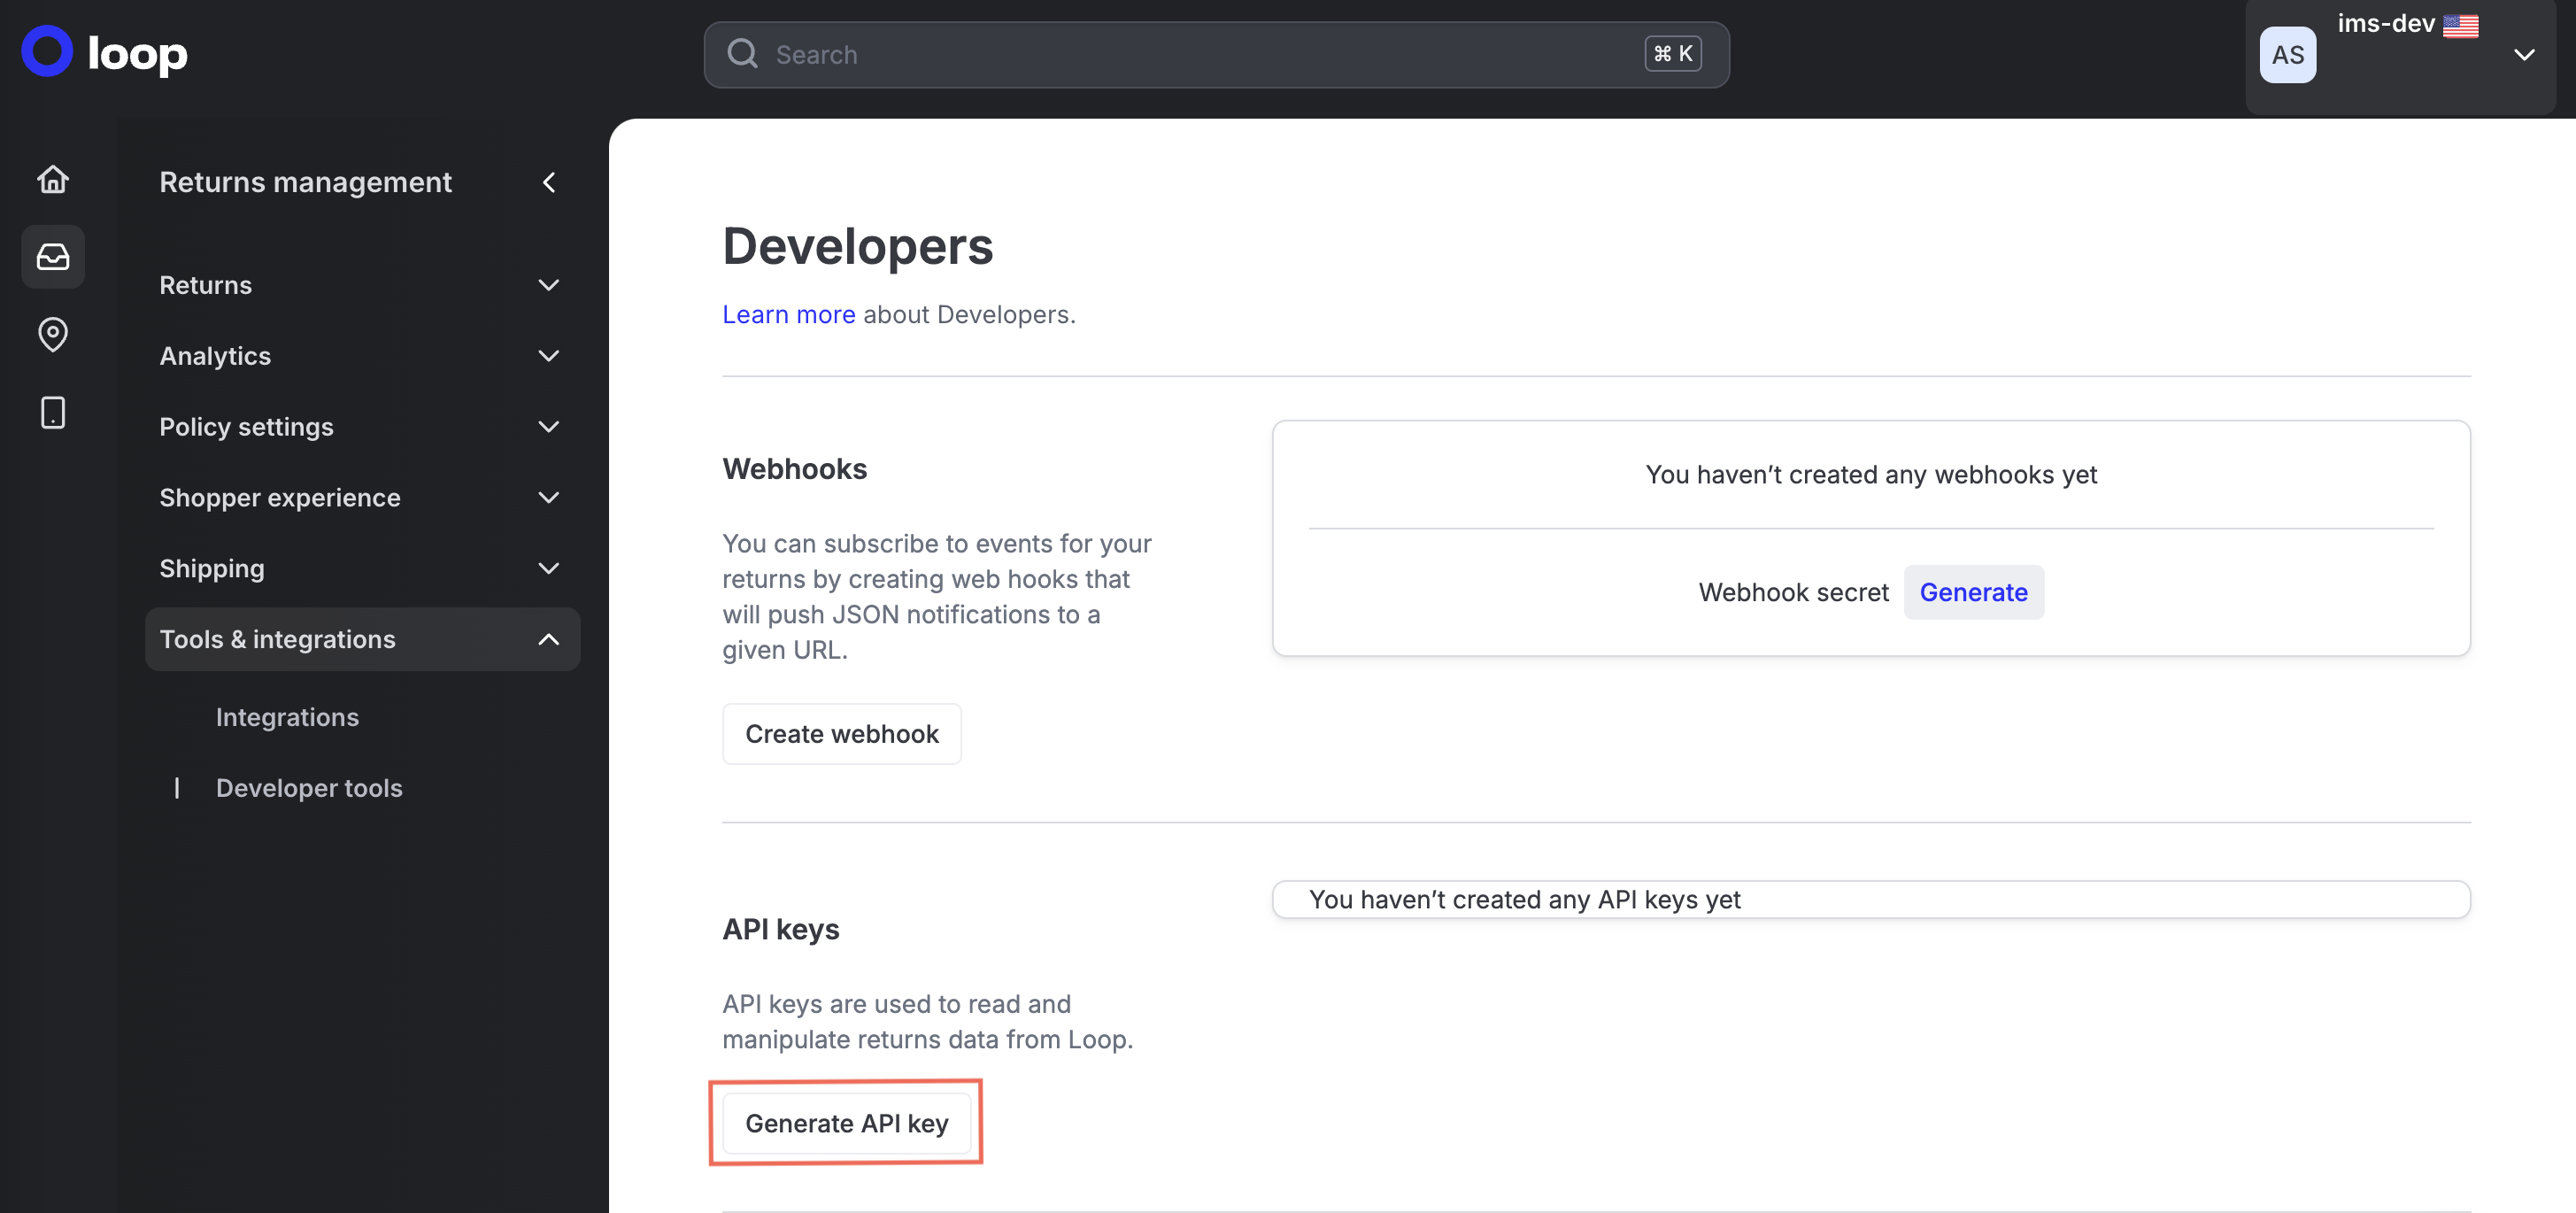
Navigate to
Returns managementand selectTools & integrations.Within
Tools & integrations, selectDeveloper tools.
In the Developer tools section, you can generate and manage your API keys. To generate a new API key, click on Generate API Key.
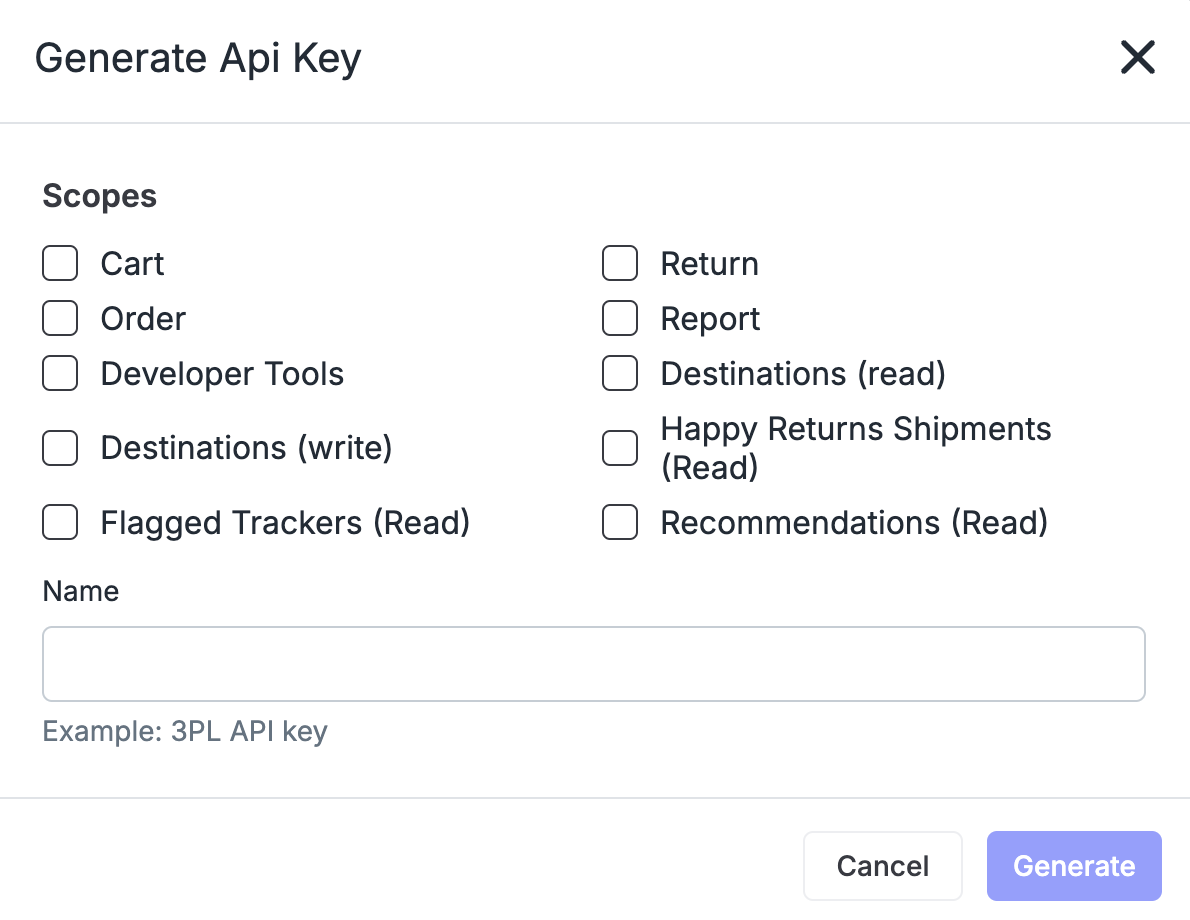
- Select the desired scopes
Select the scope and then click Generate.
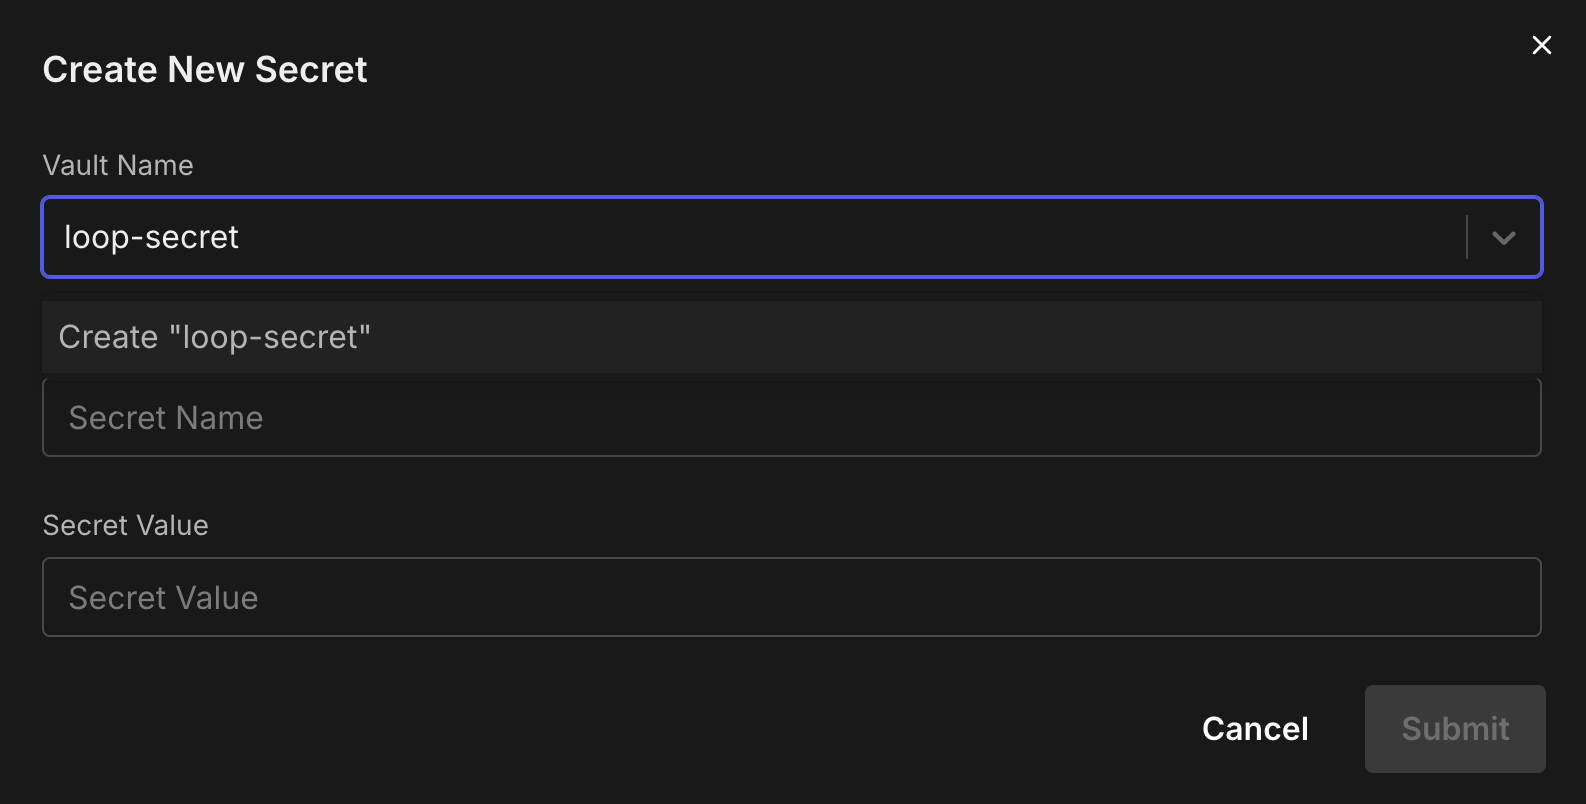
2. Store Loop Credentials
Store your Loop API key as a secret in the Tailor PF using one of the following methods:
Using the Tailor CLI
- Create a vault to store the API key
Run the following commands to create a vault named loop-vault and to store the secret key.
tailor-sdk secret vault create loop-vault
tailor-sdk secret create --vault-name loop-vault --name loop-key --value {$api_key}
Through the Console
- Navigate to your workspace where the app is deployed and select
settingstab to add the secret

- Create a new vault and add the API key
3. Making API requests to loop API
You can call the Loop APIs using triggers.