Integrate Shopify with Tailor Platform
In this guide, we will explain how to integrate Shopify with Tailor Platform by leveraging the platform's powerful triggers.
Tailor Platform Triggers
You can integrate Shopify with Tailor Platform using triggers. Refer to executor service guide to learn about different types of triggers.
Automatically push new products to your Shopify store
When you create a new product in the TailorDB, you may want to seamlessly sync that data with your Shopify store. This integration guide will walk you through the steps to set up a connection between Tailor PF and Shopify, ensuring that every time a new product is added to the TailorDB, it's automatically pushed to your Shopify storefront.
1. Get the API key
Before you can begin integrating the Tailor Platform with Shopify, you'll need to obtain an API key. This unique key serves as an authentication credential, enabling the Tailor Platform to securely communicate with your Shopify store.
To get your API key, follow the below steps:
- Login to your Shopify store and select
Settings.
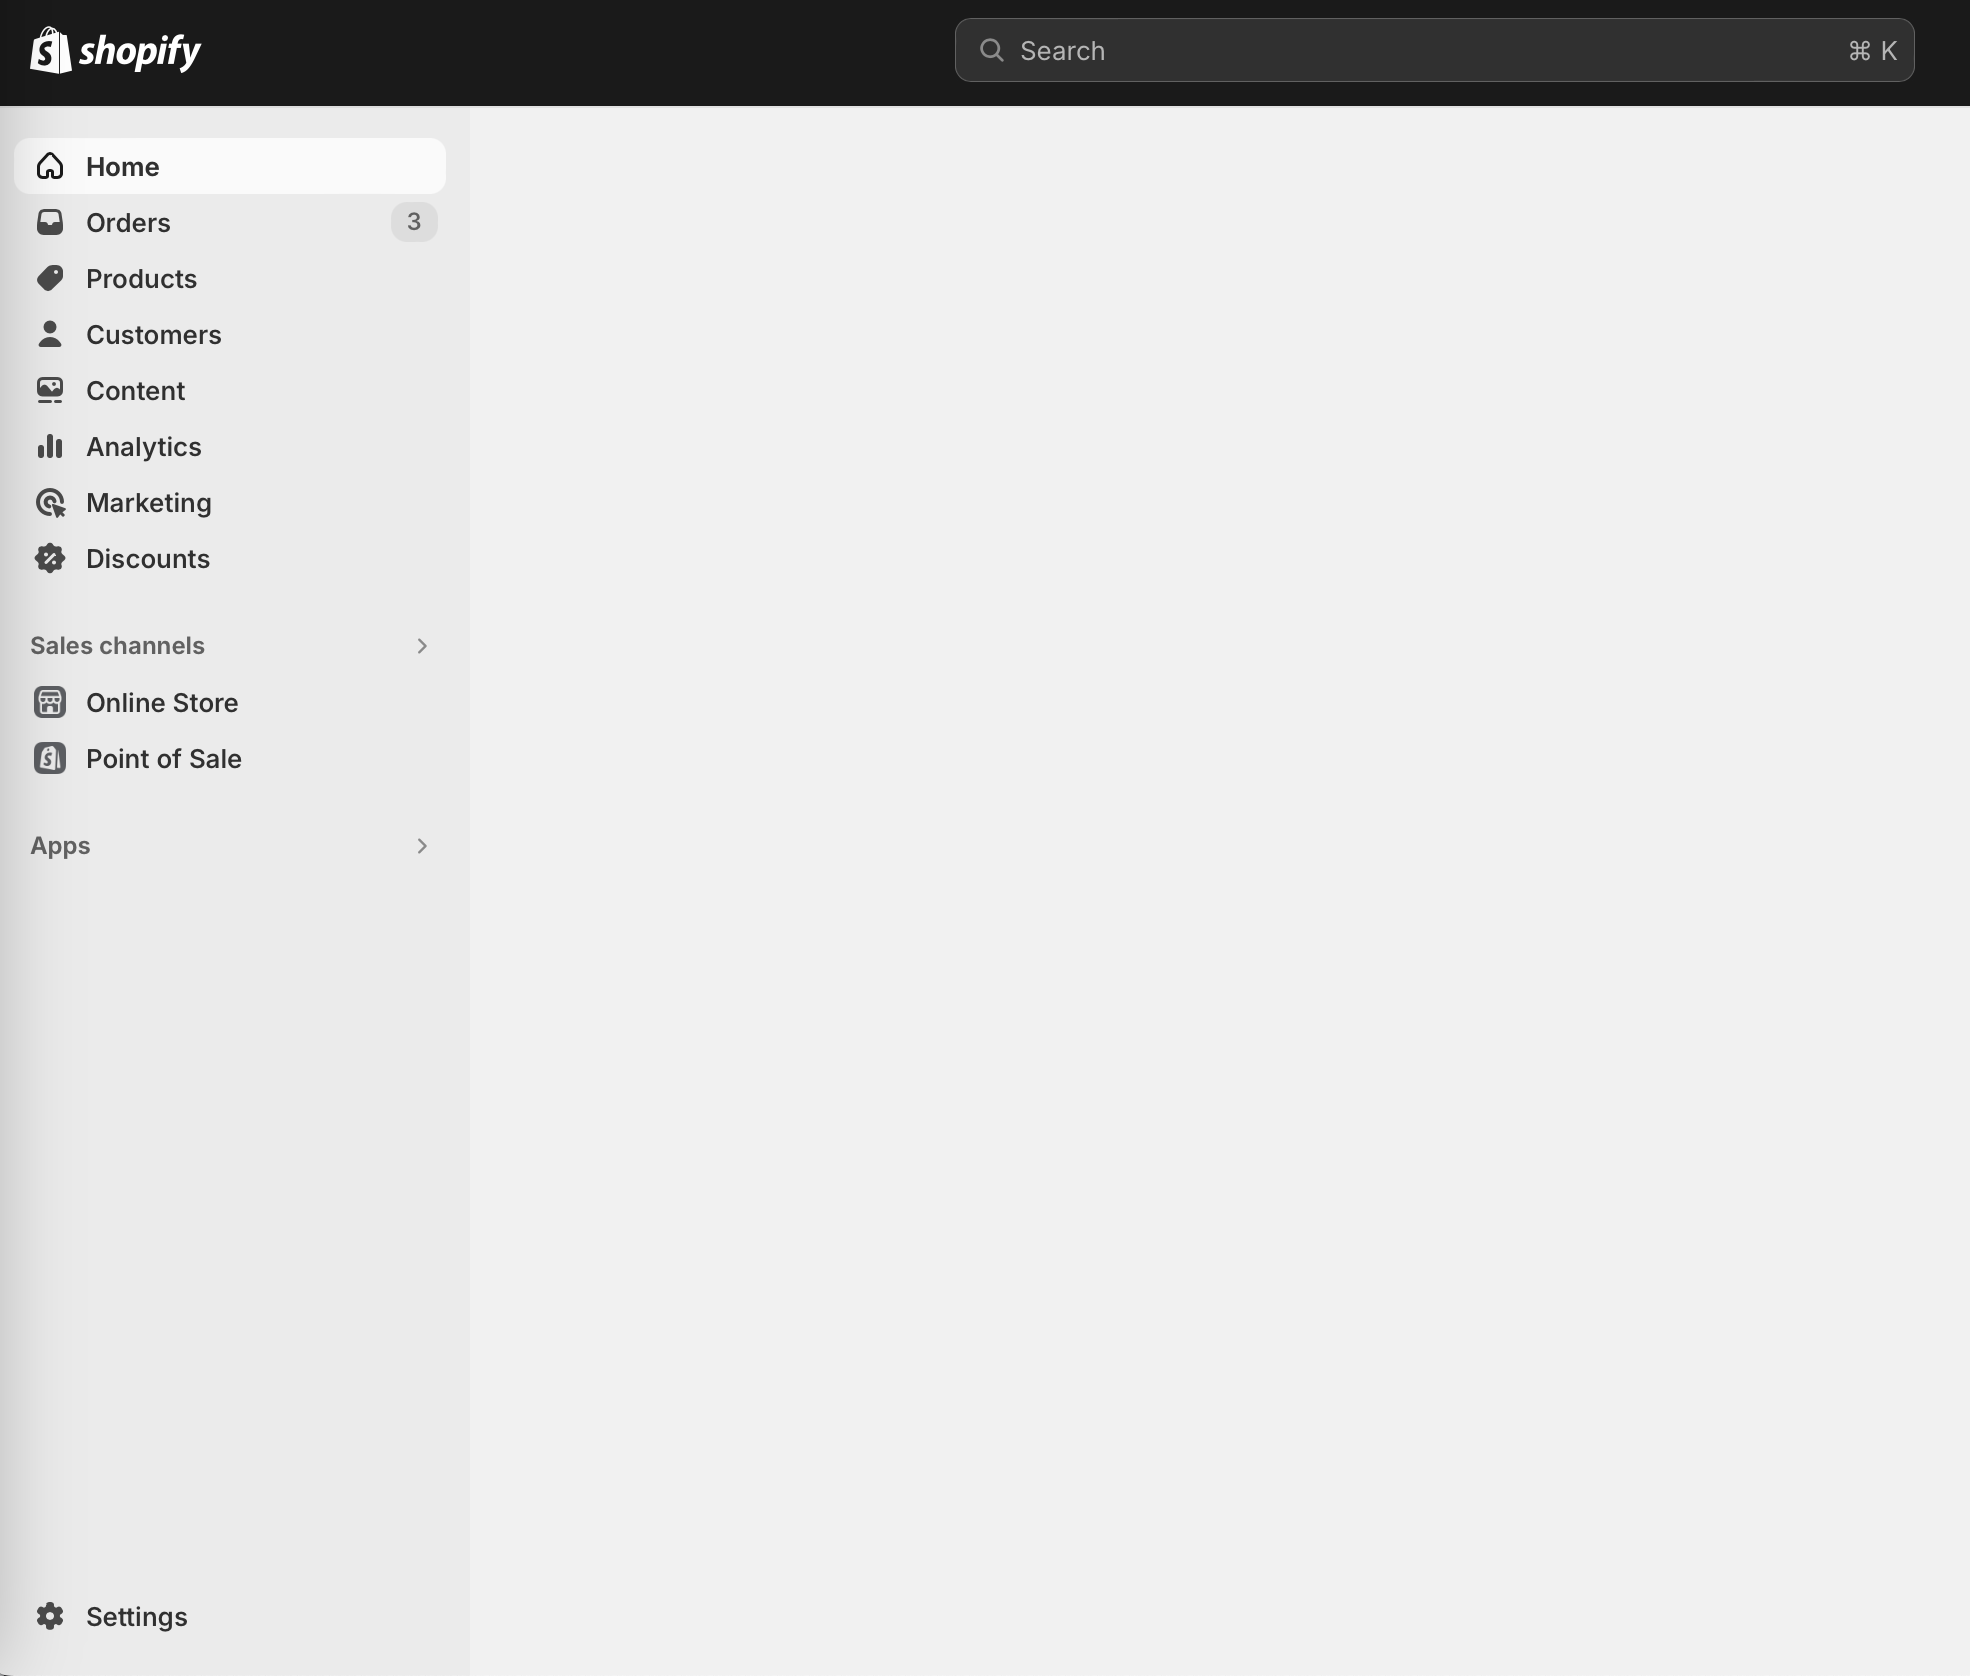
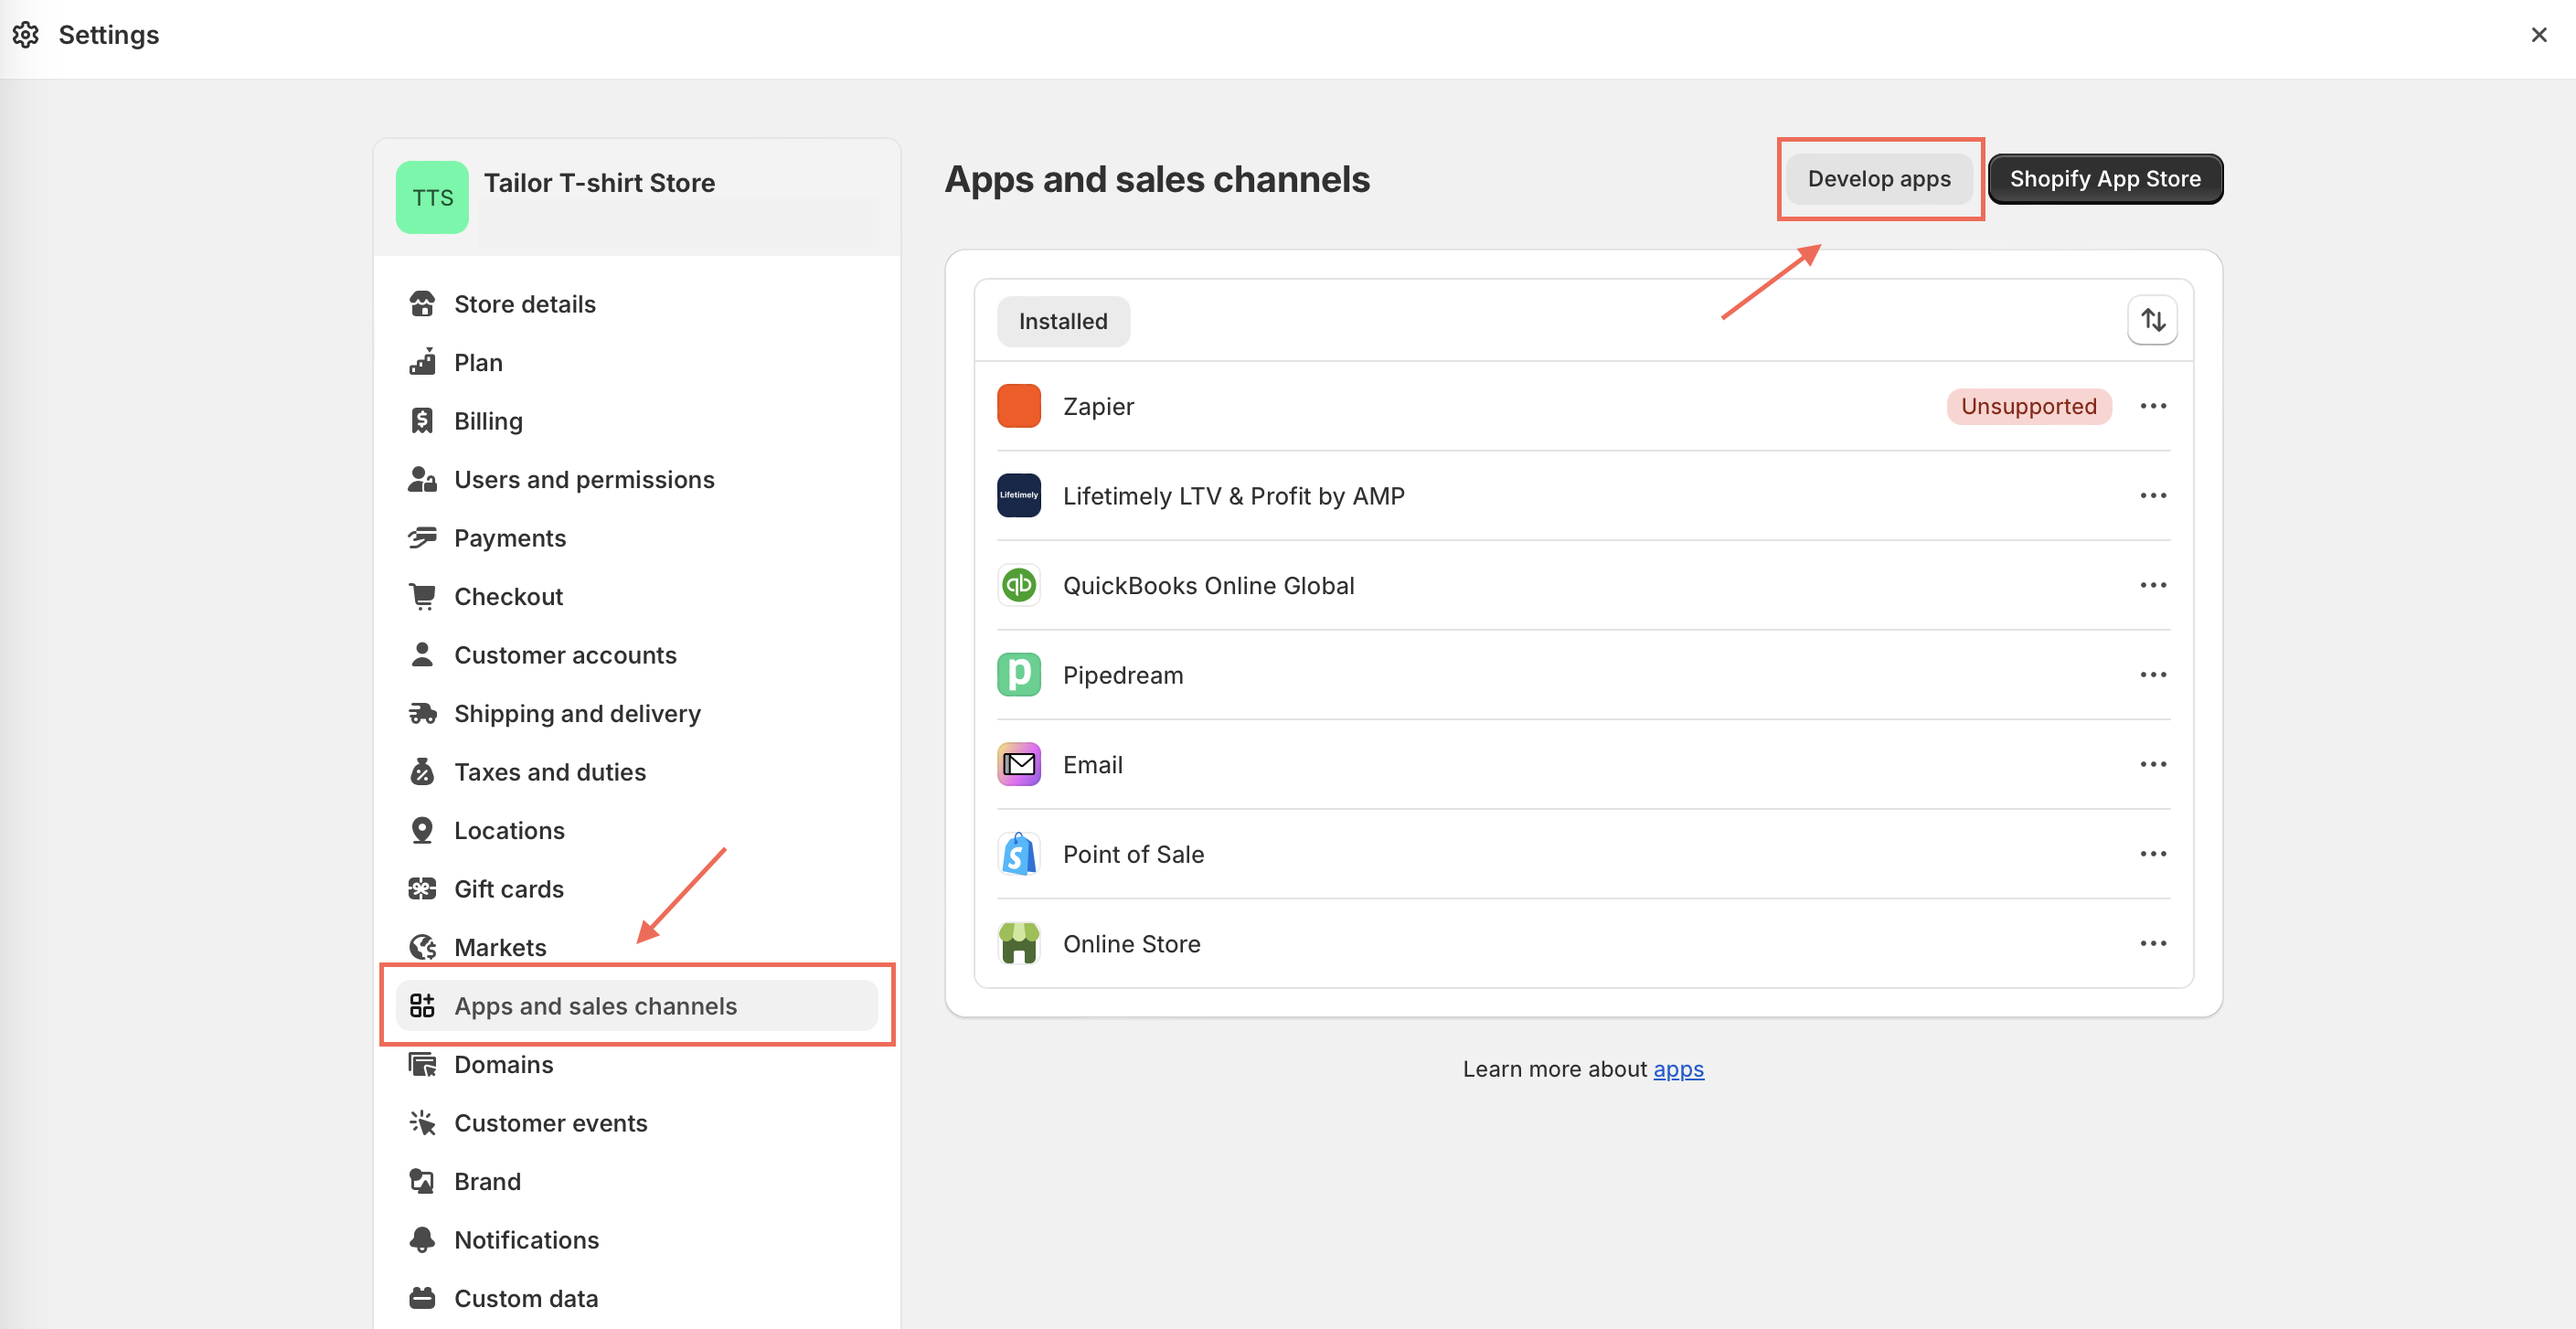
- In the
Settingspage, selectApps and sales channelsand click onDevelop apps.
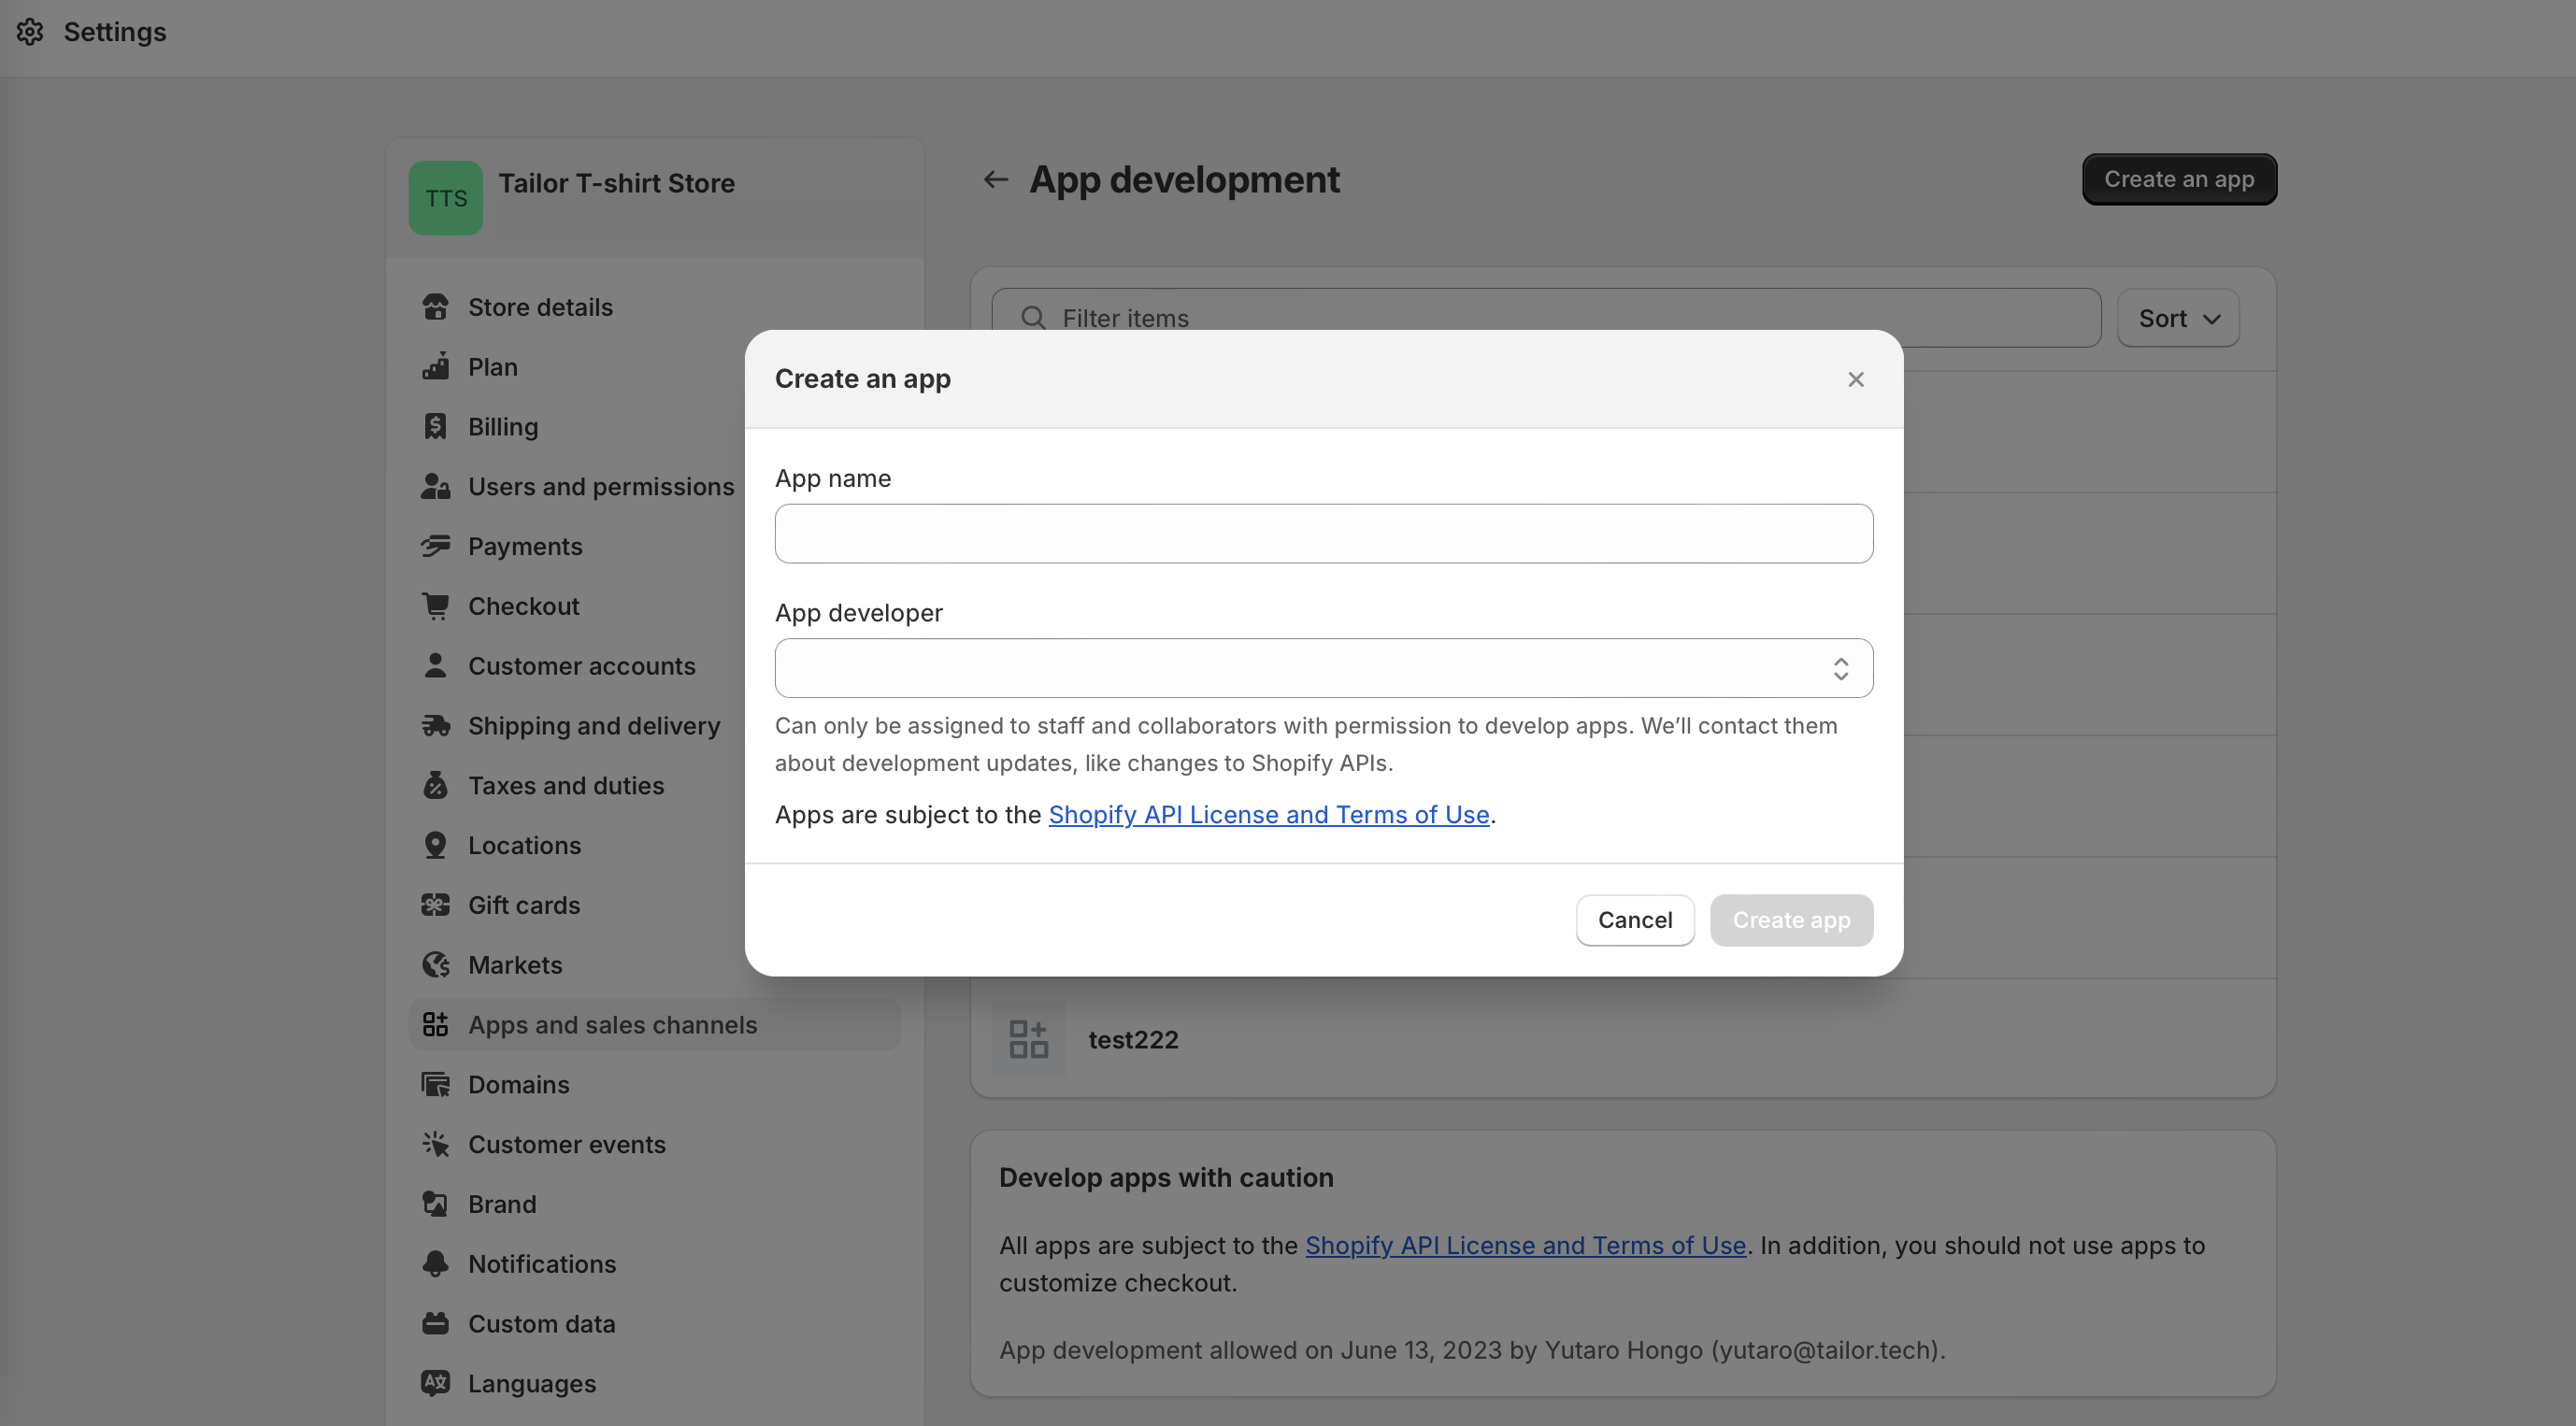
- Click
Create an app, enter the app name and create app.
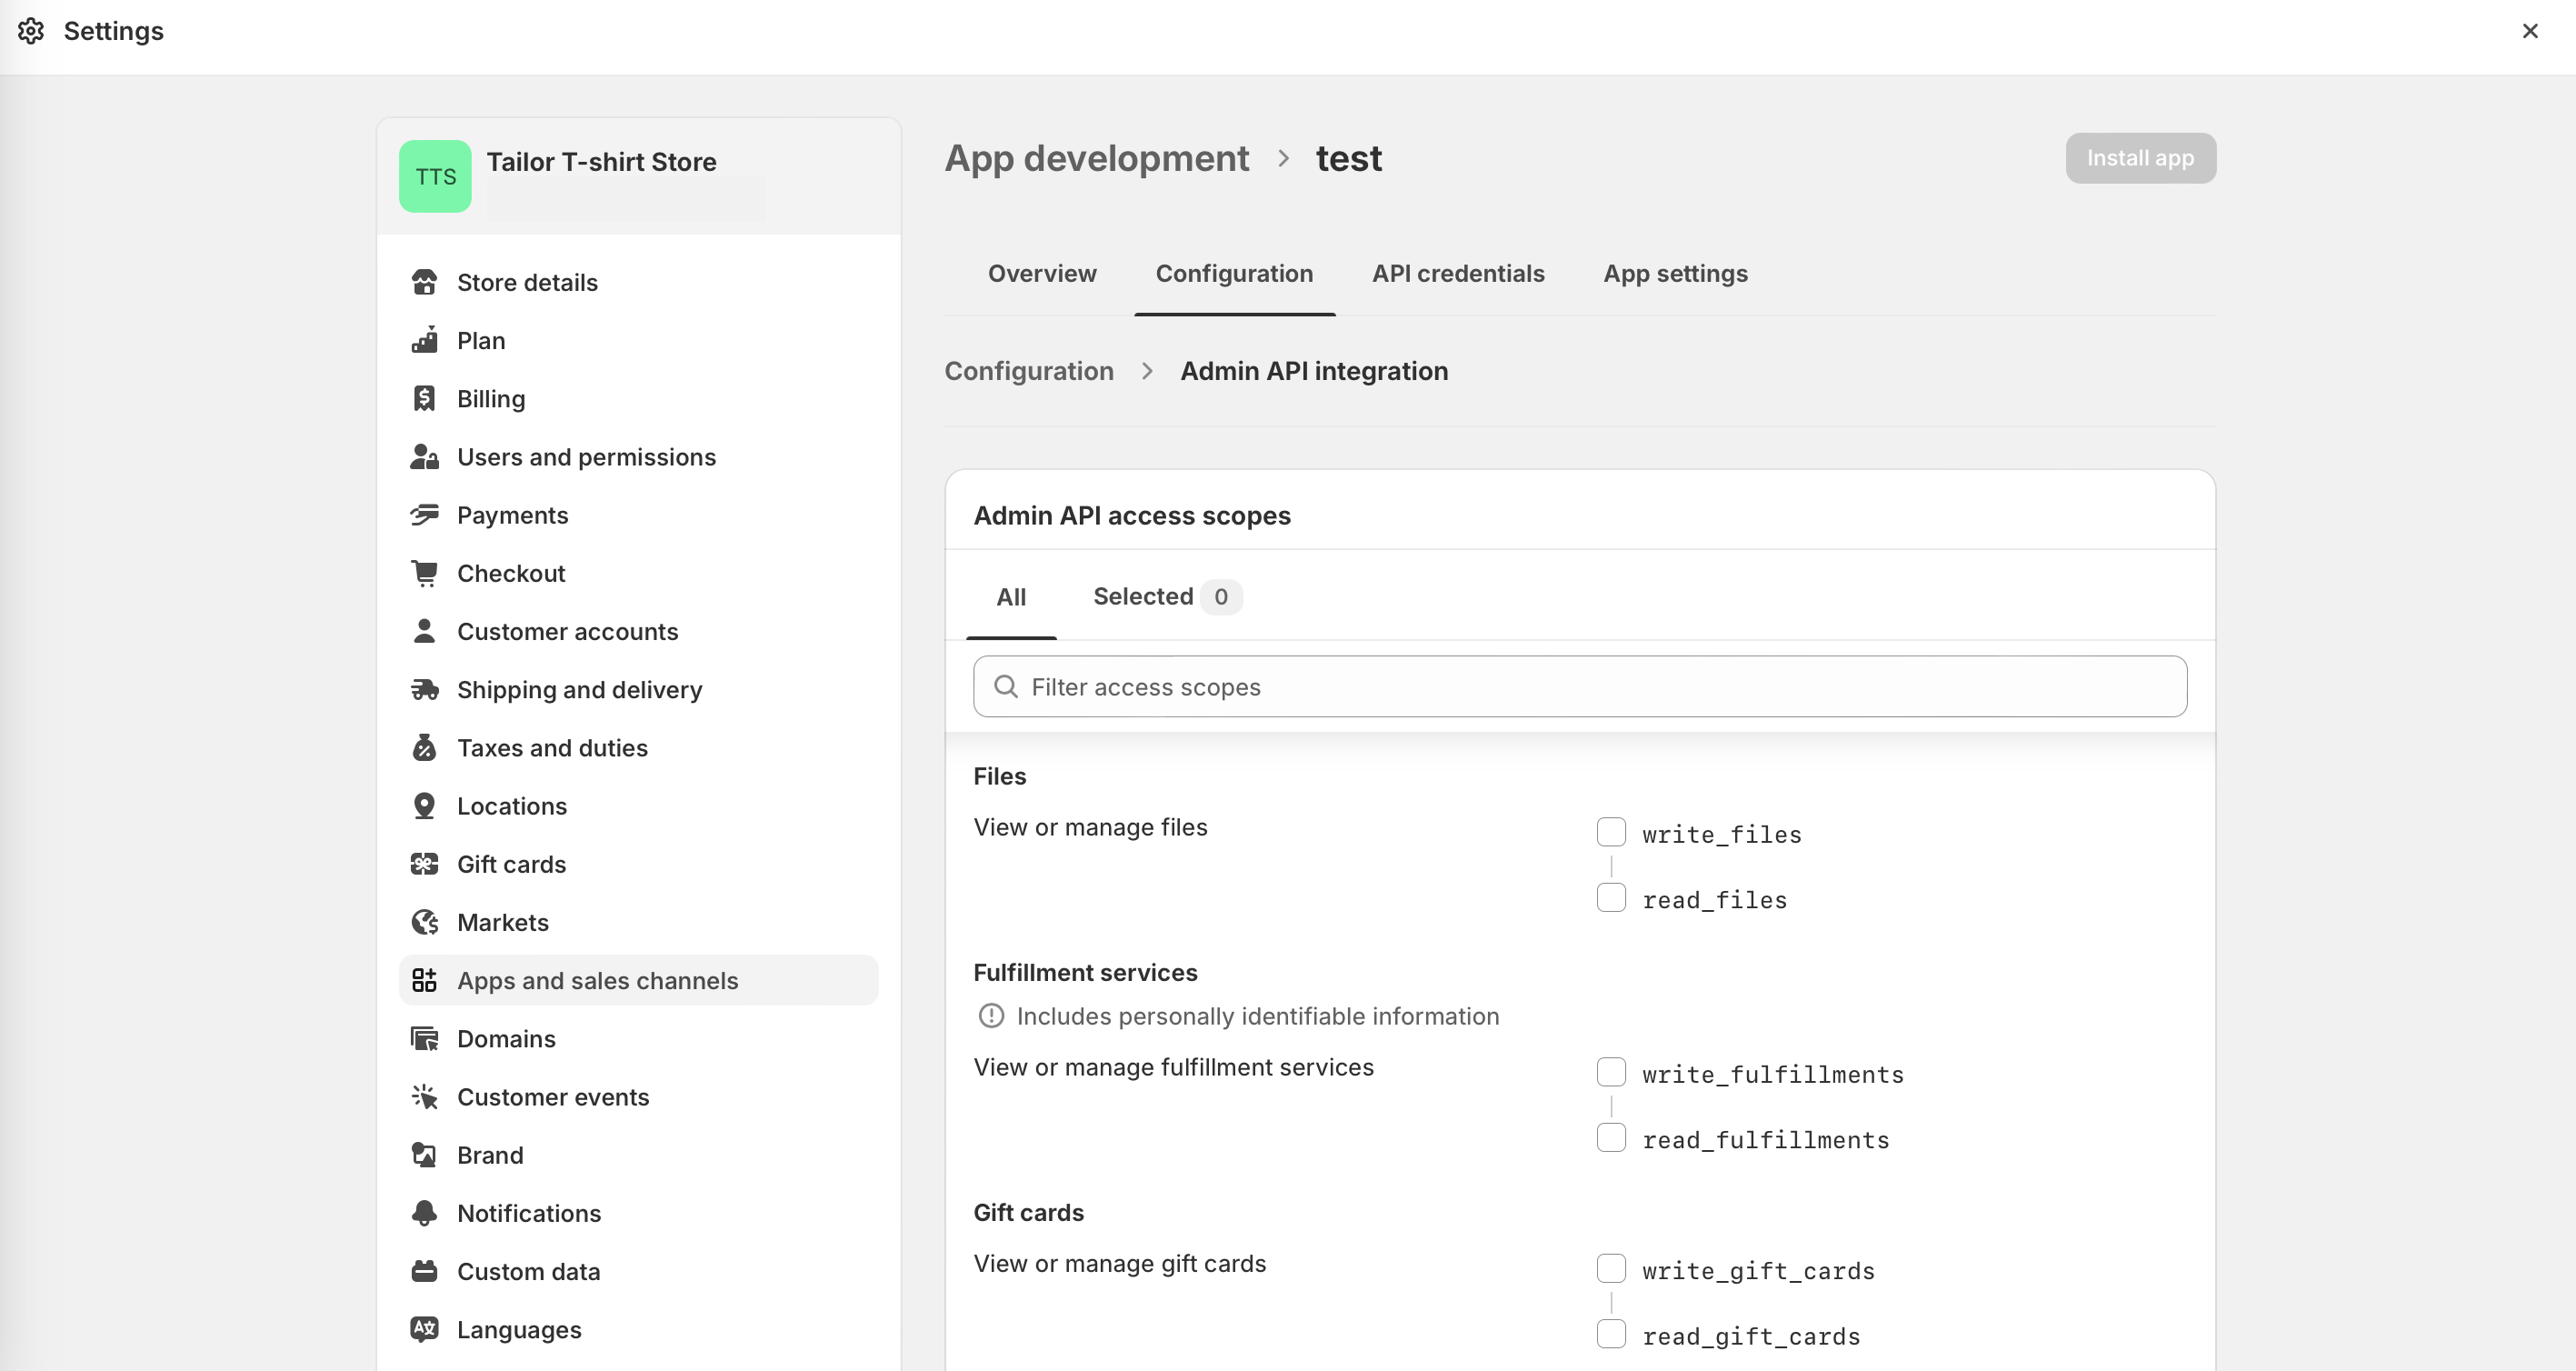
- After creating the app, configure the Admin API integration.
Check all the necessary items; at a minimum, ensure that Products R/W is checked. After making all the selections, click Save.
- Install the created app
Click the "Install app" button and follow any additional prompts to complete the installation.

- Click on "Reveal Token Once" to save your access token
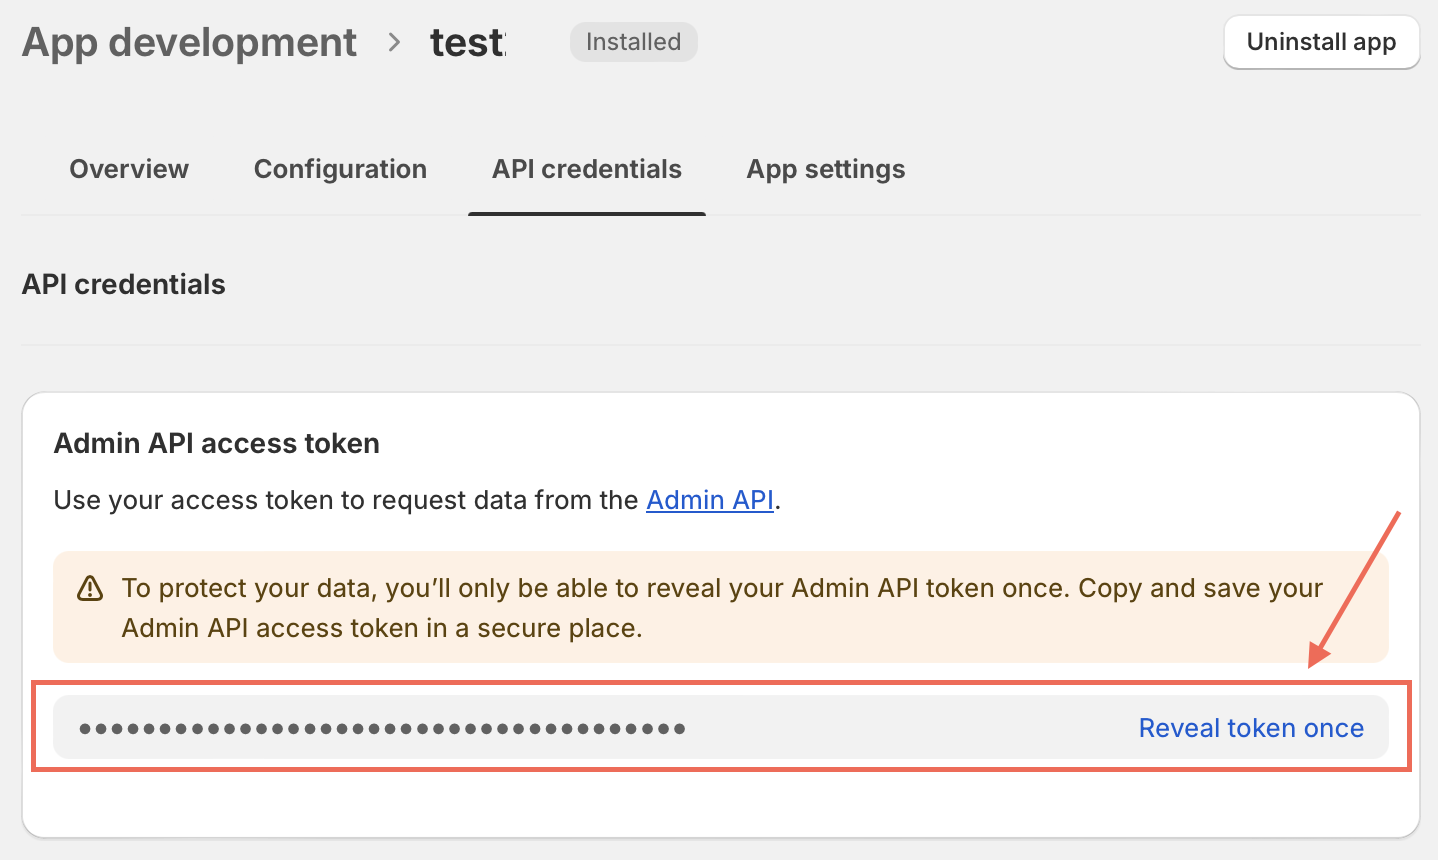
Treat your API key as a sensitive data and never share it publicly or commit it to version control systems. The API key grants access to your Shopify store data, so it's essential to keep it secure.
2. Create a trigger to push the product to your Shopify Store
Follow the below steps to create an event based trigger.
- Enable
PublishRecordEventssettings in theProductstype
To enable event publishing for Product records, add the publishRecordEvents feature to your Product type:
import { db } from "@tailor-platform/sdk";

export const product = db
  .type("Product", "Product data schema", {
    name: db.string().description("Product name"),
    description: db.string().description("Product description"),
    // ... other fields
  })
  .features({
    publishRecordEvents: true,
});- Create a vault to store the API key
Run the following commands to create a vault named shopify-vault and to store the secret key.
tailor-sdk secret vault create shopify-vault
tailor-sdk secret create --vault-name shopify-vault --name shopify-key --value {$your_API_key}- Add the trigger
Below is an example of the trigger that will push new product to Shopify store when a product is added to the TailorDB.
import { createExecutor, recordCreatedTrigger } from "@tailor-platform/sdk";
import { product } from "../tailordb/product";

export default createExecutor({
  name: "shopify-product-sync",
  description: "Push new products to Shopify when created in TailorDB",
  trigger: recordCreatedTrigger({
    type: product,
    condition: ({ newRecord }) => !!newRecord.name && !!newRecord.description,
  }),
  operation: {
    kind: "webhook",
    url: "https://YOUR_STORE.myshopify.com/admin/api/2024-01/products.json",
    method: "POST",
    headers: {
      "X-Shopify-Access-Token": "{{secret.shopify-vault.shopify-key}}",
      "Content-Type": "application/json",
    },
    body: (context) => ({
      product: {
        title: context.event.newRecord.name,
        body_html: context.event.newRecord.description,
        vendor: "Your Store",
        product_type: "General",
      },
    }),
  },
});- Deploy the changes
Run the following command to deploy your executor:
npx tailor deploy- Verify the trigger
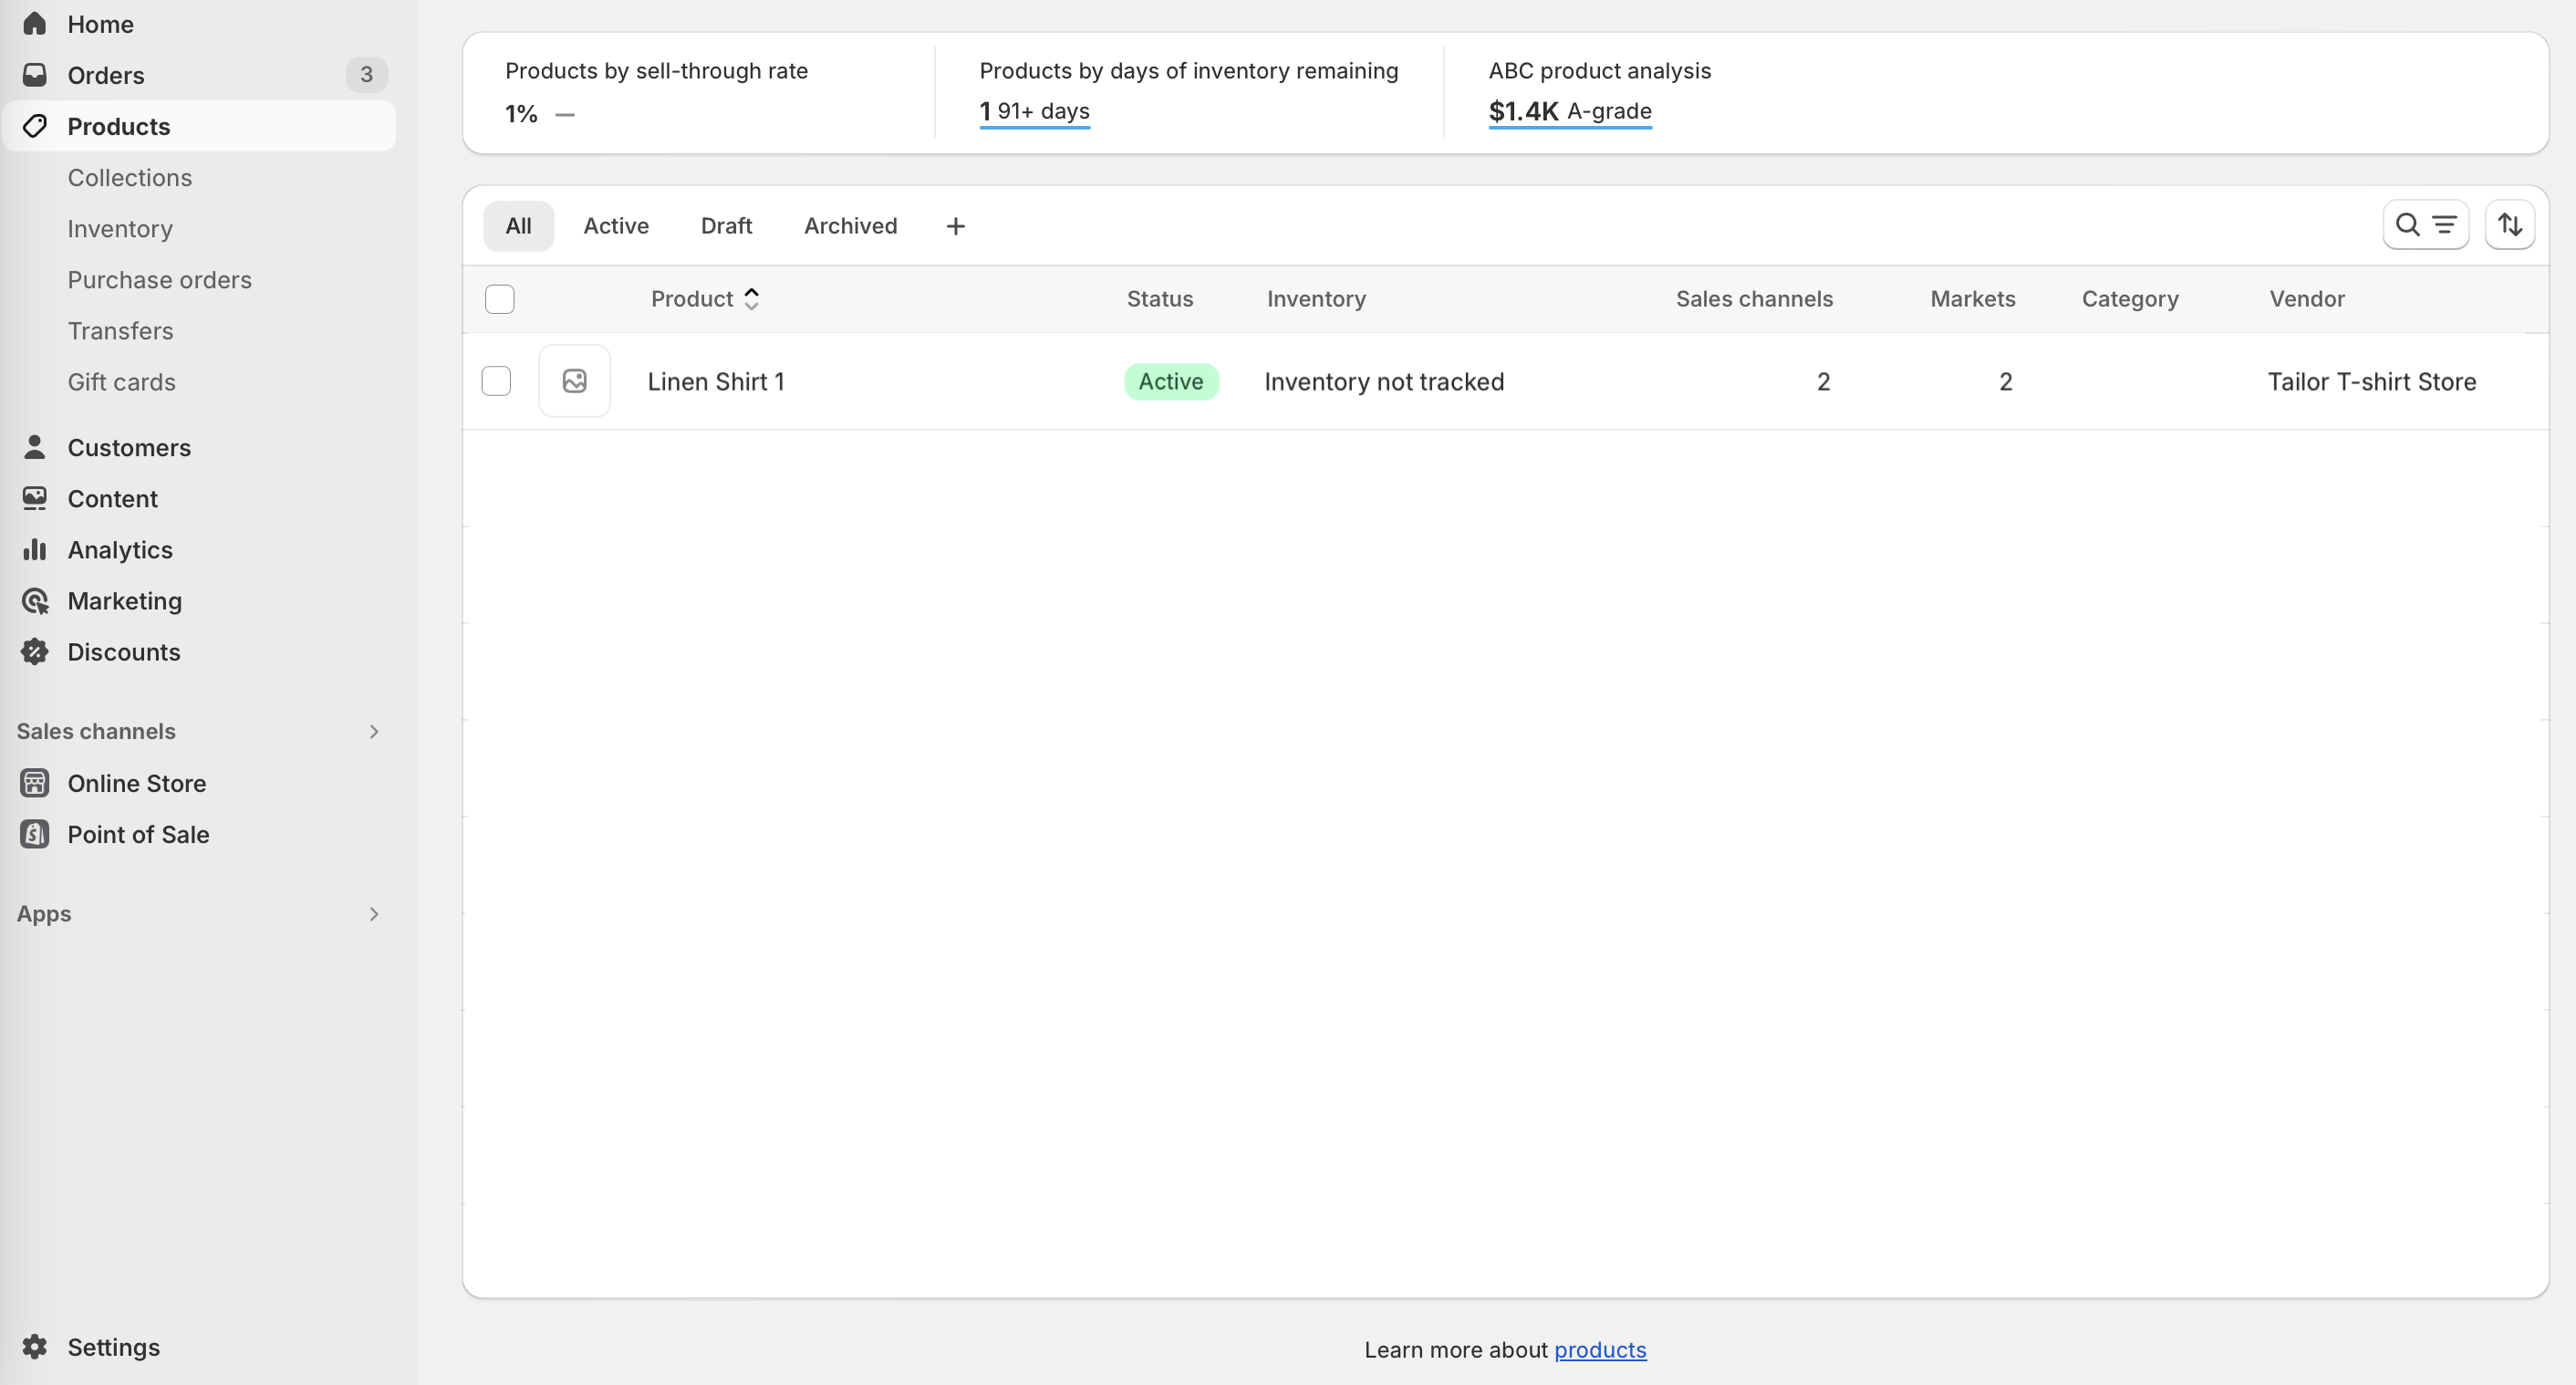
Run the following query to create a new product.
mutation {
  createProduct(input: { description: "Comfortable antibacterial shirt", name: "Linen shirt 1"}) {
    id
  }
}
After running the above mutation, you can see that the product is automatically pushed to your Shopify store.
See Event based triggers to learn more.
Get notification from Shopify on new Product creation
To get notifications about particular events in the store, you can use incoming webhook trigger in the Tailor Platform.
Here's a step-by-step guide on how to set up an incoming webhook trigger in the Tailor Platform to receive notifications.
1. Create an Incoming Webhook Trigger
Follow the steps below to create an incoming webhook trigger
- Add an incoming webhook trigger in the executor configuration
import { createExecutor, incomingWebhookTrigger } from "@tailor-platform/sdk";

export default createExecutor({
  name: "shopify-webhook-handler",
  description: "Handle Shopify product creation webhook",
  trigger: incomingWebhookTrigger(),
  operation: {
    kind: "tailorGraphql",
    query: `
      mutation createProduct($input: createProductInput!) {
        createProduct(input: $input) {
          id
          name
        }
      }
    `,
    variables: (context) => ({
      input: {
        name: context.body.product.title,
        description: context.body.product.body_html,
      },
    }),
  },
});- Deploy the executor
npx tailor deploy- Get the webhook URL
After deployment, get your webhook URL:
tailor-sdk executor listYou will see the webhook URL in the output which you'll use to configure Shopify.
2. Configure Shopify to Send Notifications
Run the command below to get the endpoint for configuring Shopify.
tailor-sdk executor webhook listYou will receive the following URL in response.
NAME | incomingwebhook-executor
URL  | {WEBHOOK_URL}
Next, to configure Shopify, follow the steps below.
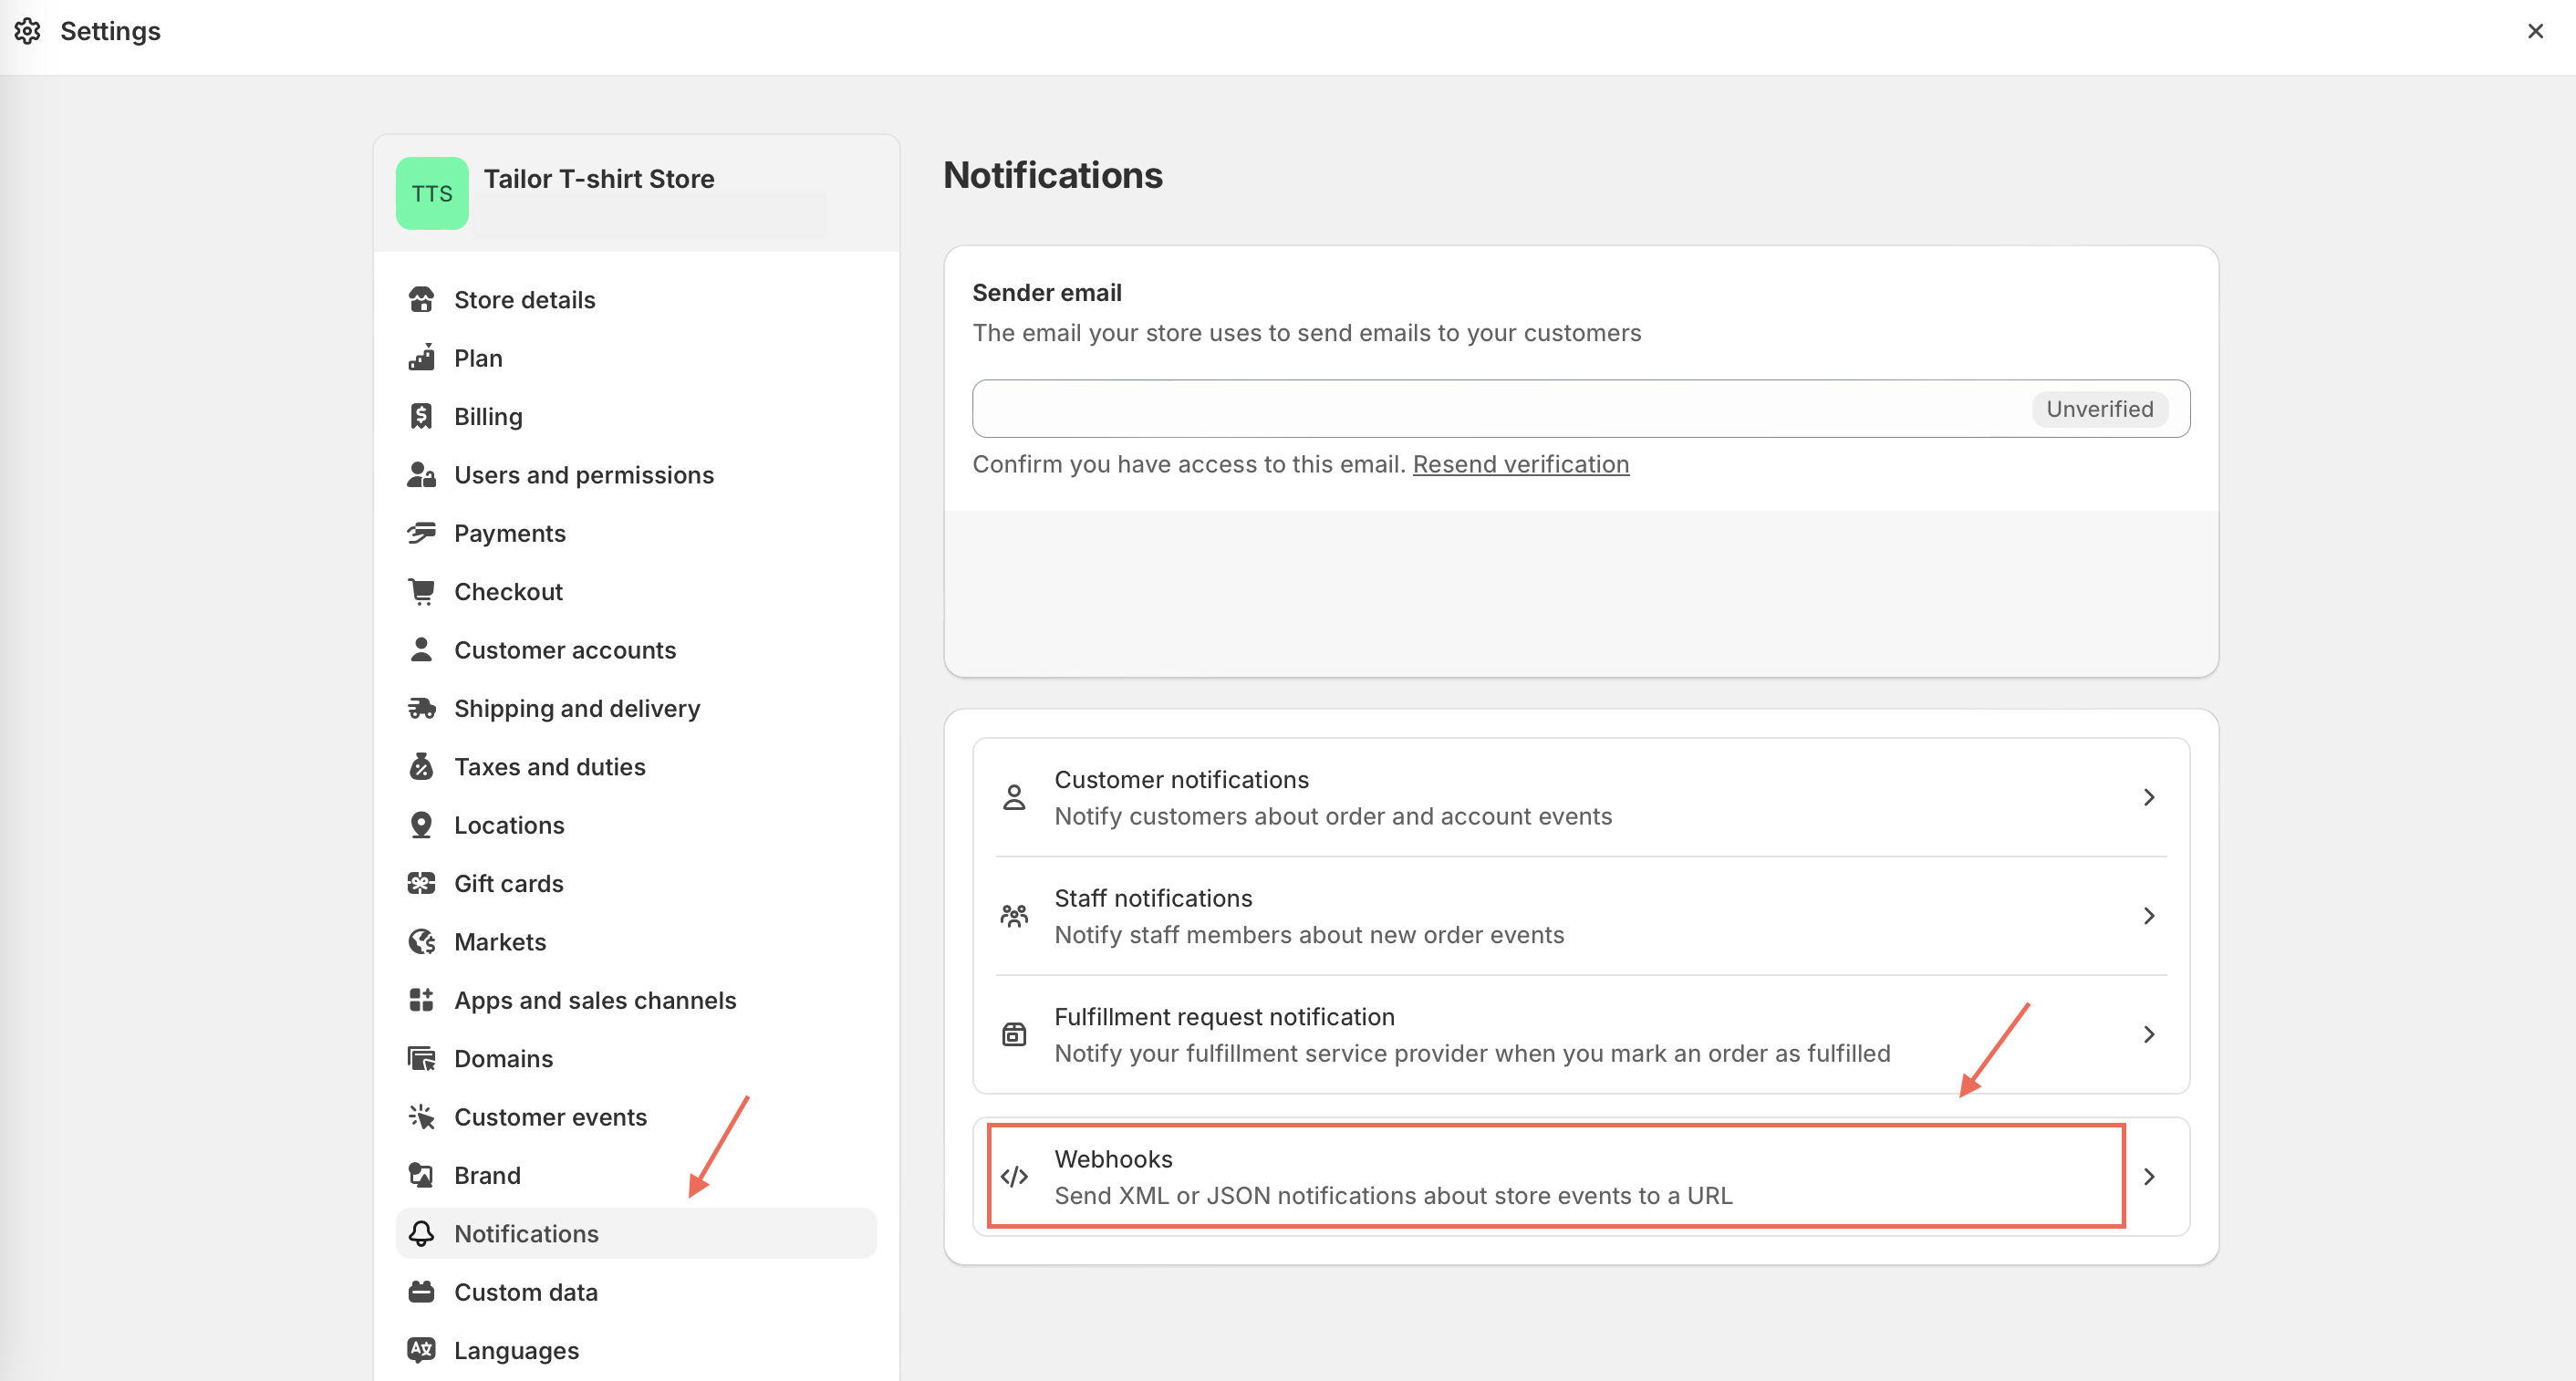
- Login to your Shopify store and select
Settings. In theSettingspage, selectNotificationsand click onWebhooks.
- Create Webhook
Choose Product creation event from the dropdown, paste the url constructed in step 2 and click Save to create the webhook.
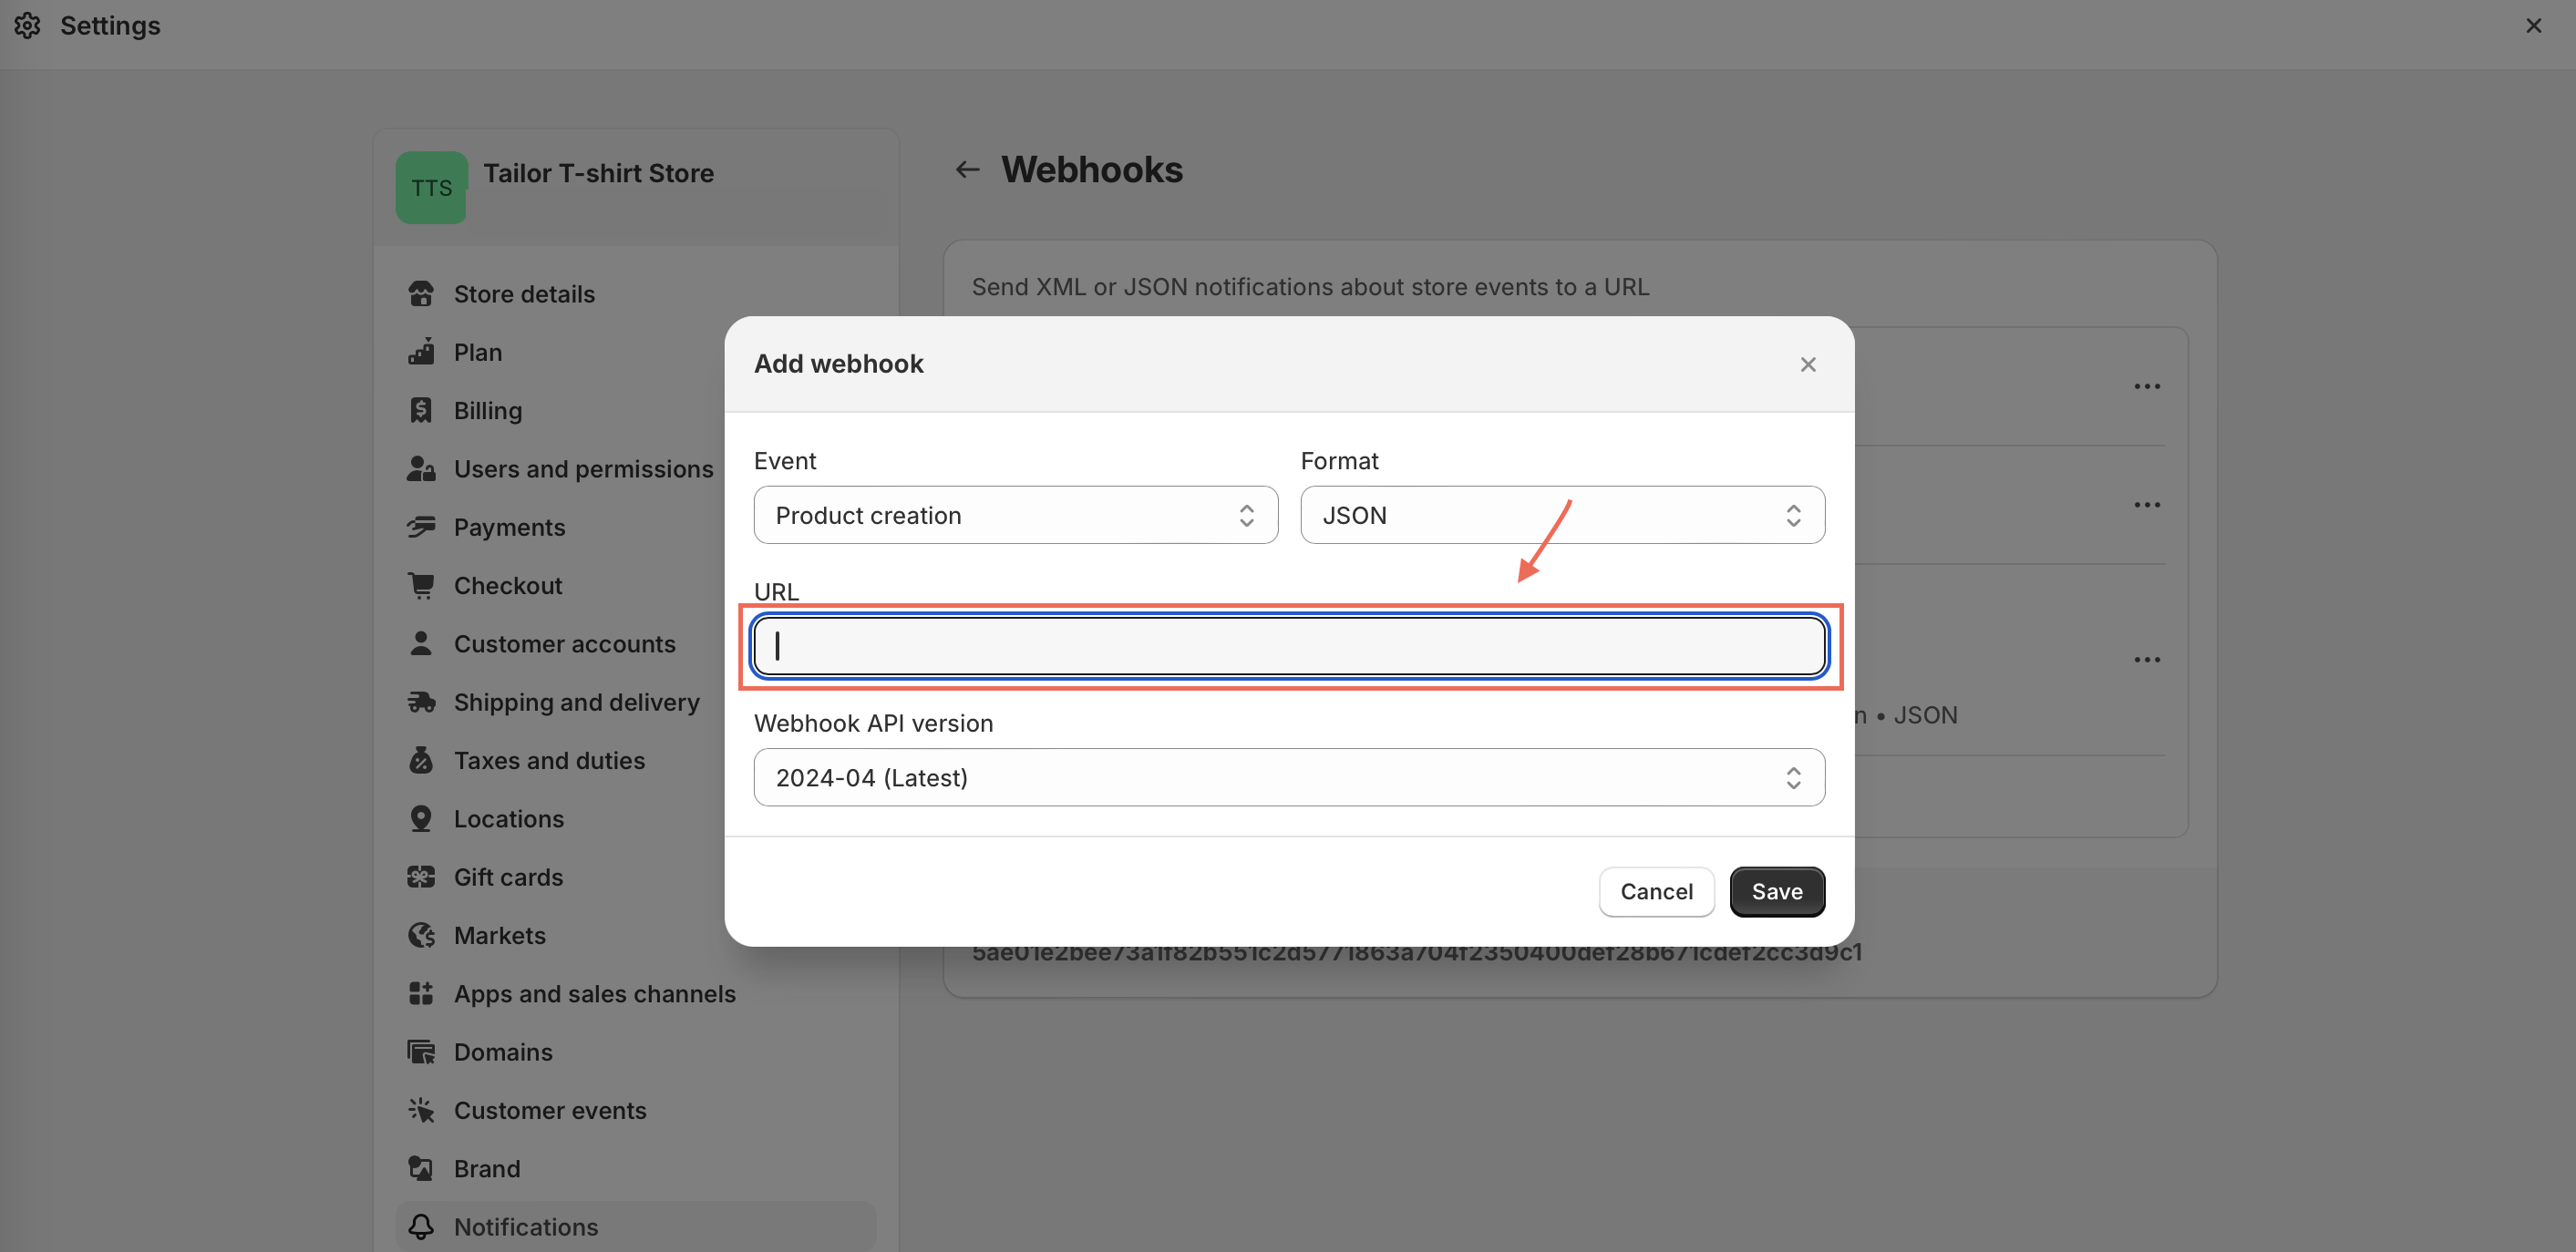
You have now successfully created the webhook to receive notifications in the Tailor platform from the Shopify store for the Product creation event.
3. Verify the trigger
You can open the GraphQL playground to verify the product created in Shopify is added to TailorDB.
# Open the GraphQL playground in the browser
tailor-sdk open
Run the following query to view all the products.
query {
  products {
    edges {
      node {
        id
        name
      }
    }
  }
}