Setting up an Event-based Trigger
Event-based triggers allow you to automatically run actions when specific database events occur. In this tutorial, we'll create an executor that sends a Slack notification when a Project's status changes to "COMPLETED".
- To follow along with this tutorial, first complete the SDK Quickstart and the Data Schema Basics tutorial.
Tutorial Steps
To create an event-based trigger, you'll need to:
- Configure the Executor service
- Create the executor with a record updated trigger
- Enable
publishEventsfeature on the Project type - Deploy the changes
- Verify the trigger
1. Configure the Executor Service
Update your tailor.config.ts to include the executor service:
import { defineConfig } from "@tailor-platform/sdk";

export default defineConfig({
  name: "project-management",
  db: {
    "main-db": {
      files: ["db/**/*.ts"],
    },
  },
  executor: {
    files: ["executor/**/*.ts"],
  },
});
This configures the SDK to load executor definitions from the executor/ directory.
2. Create the Executor with Record Updated Trigger
Create a new file executor/notify-project-completion.ts:
import { createExecutor, recordUpdatedTrigger } from "@tailor-platform/sdk";
import { project } from "../db/project";
import { getDB } from "../generated/tailordb";

export default createExecutor({
  name: "notify-project-completion",
  description: "Send Slack notification when project is completed",
  trigger: recordUpdatedTrigger({
    type: project,
    condition: ({ newRecord, oldRecord }) =>
      newRecord.status === "COMPLETED" && oldRecord.status !== "COMPLETED",
  }),
  operation: {
    kind: "webhook",
    url: () => "https://hooks.slack.com/services/YOUR_WEBHOOK_URL",
    headers: {
      "Content-Type": "application/json",
    },
    requestBody: async ({ newRecord }) => {
      const db = getDB("main-db");

      // Count tasks for summary
      const taskStats = await db
        .selectFrom("Task")
        .select(({ fn }) => [
          fn.count<number>("id").as("total"),
          fn.countAll<number>().filterWhere("status", "=", "DONE").as("completed"),
        ])
        .where("projectId", "=", newRecord.id)
        .executeTakeFirst();

      return {
        text: `🎉 Project Completed: ${newRecord.name}`,
        blocks: [
          {
            type: "section",
            text: {
              type: "mrkdwn",
              text: `*Project:* ${newRecord.name}\n*Status:* ${newRecord.status}\n*Tasks:* ${taskStats?.completed}/${taskStats?.total} completed`,
            },
          },
        ],
      };
    },
  },
});
Key Components:
Trigger:
recordUpdatedTrigger()fires when a Project record is updatedtype: project: Specifies which type to monitorcondition: Only triggers when status changes TO "COMPLETED" (not already completed)
Operation:
webhooksends HTTP POST request to Slackurl: Your Slack webhook URL (replace with actual URL from Slack)requestBody: Constructs the Slack message with project details and task statistics
Database Query: Uses Kysely to query task completion statistics before sending the notification
3. Enable publishEvents Feature
To ensure the executor triggers when Project records are updated, enable publishEvents in your Project type definition.
Update your db/project.ts file:
import { db } from "@tailor-platform/sdk";

export const project = db
  .type("Project", {
    name: db.string().description("Project name"),
    description: db.string().optional().description("Project description"),
    status: db
      .enum(["planning", "active", "completed", "archived"])
      .description("Current project status"),
    startDate: db.string().optional().description("Project start date"),
    endDate: db.string().optional().description("Project end date"),
    createdAt: db.string().description("Creation timestamp"),
    updatedAt: db.string().description("Last update timestamp"),
  })
  .features({
    publishEvents: true,
  });
The .features({ publishEvents: true }) configuration enables the platform to publish events when Project records are created, updated, or deleted. Without this feature enabled, the executor trigger will not fire.
4. Deploy the Changes
Before deploying, make sure you have:
- Created a Slack webhook URL (see Slack Incoming Webhooks)
- Replaced
YOUR_WEBHOOK_URLin the executor code with your actual webhook URL
Generate Kysely types for type-safe database access:
npm run generateThis generates TypeScript types and the getDB() helper in the generated/ directory.
Deploy your application:
npm run deploy -- --workspace-id <your-workspace-id>The SDK will deploy both the updated Project type with publishEvents enabled and the new executor.
5. Verify the Trigger
Open the Console and navigate to your workspace. Select Executors to view the created executor.
Test the Executor:
- Create a test project: In the GraphQL Playground, create a project with some tasks:
mutation {
  createProject(
    input: {
      name: "Website Redesign"
      description: "Complete redesign of company website"
      status: "active"
      createdAt: "2026-02-09T10:00:00Z"
      updatedAt: "2026-02-09T10:00:00Z"
    }
  ) {
    id
  }
}- Create some tasks for the project (use the project ID from above):
mutation {
  createTask(
    input: {
      title: "Design homepage"
      projectId: "<project-id>"
      status: "DONE"
      createdAt: "2026-02-09T10:00:00Z"
      updatedAt: "2026-02-09T10:00:00Z"
    }
  ) {
    id
  }
}- Update the project status to COMPLETED:
mutation {
  updateProject(
    id: "<project-id>"
    input: { status: "COMPLETED", updatedAt: "2026-02-09T11:00:00Z" }
  ) {
    id
    status
  }
}
Check Slack: You should receive a notification in your Slack channel with the project name and task completion statistics.
View executor logs: In the Console, select the
Jobstab to see the executor execution history.
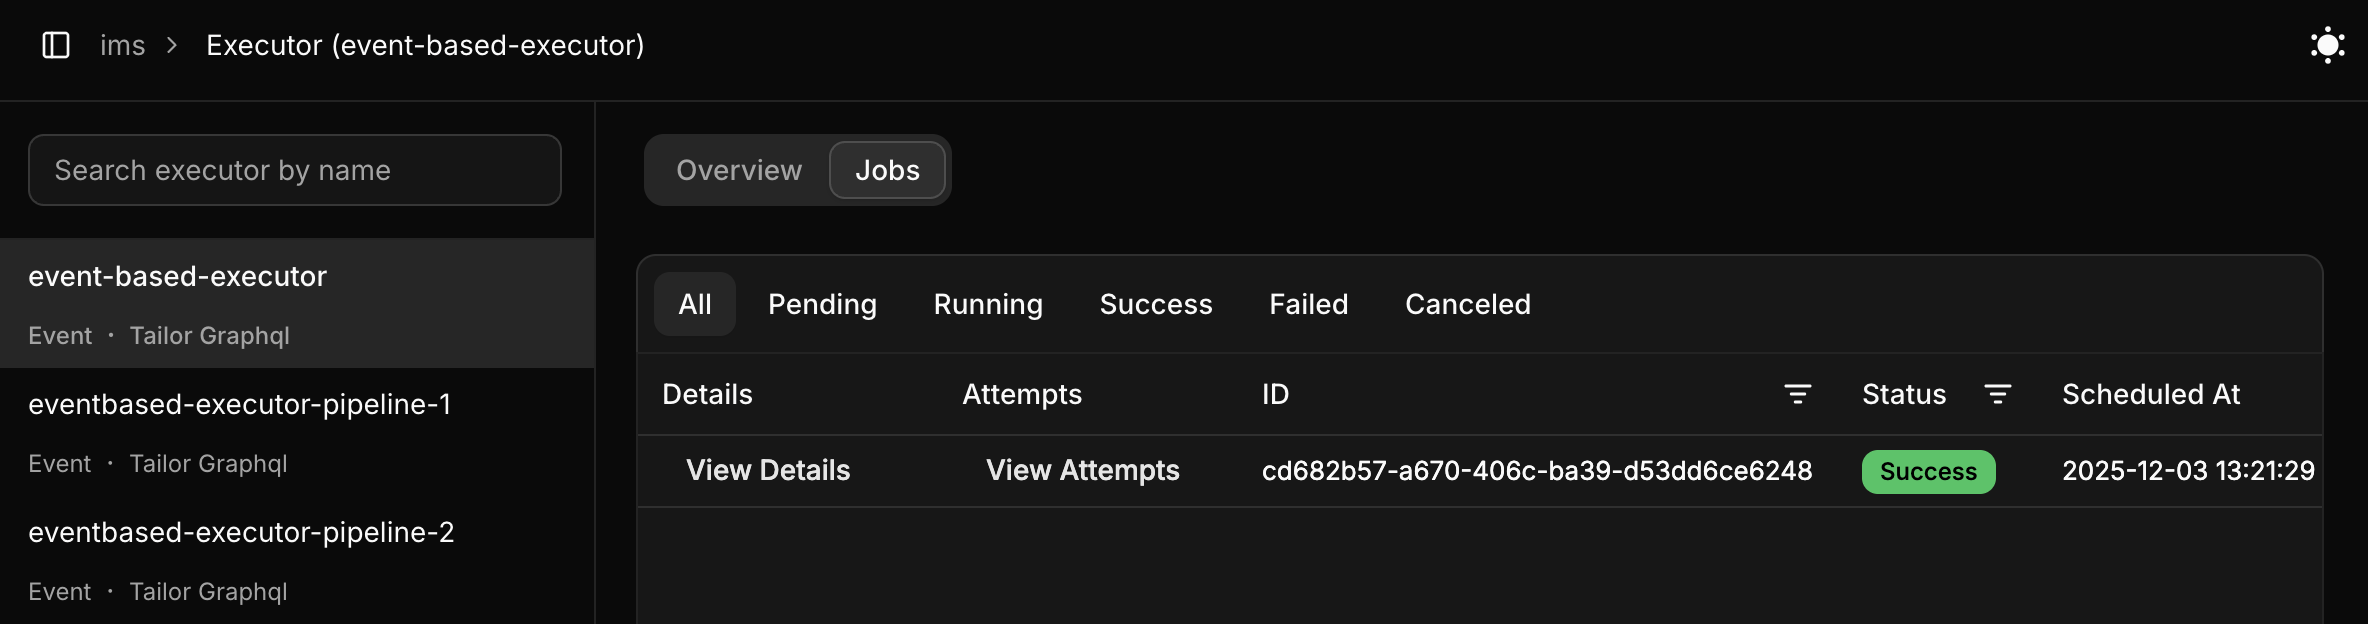
Clicking View Attempts displays details of job execution attempts. The Tailor Platform automatically retries failed webhook calls (non-2xx status codes), except for configuration or script errors.
Troubleshooting:
- No notification received: Verify your Slack webhook URL is correct
- Executor not triggering: Ensure
publishEvents: trueis set in.features()on the Project type - Error in logs: Check the executor logs in the Console for detailed error messages
Multi-Event Triggers
Instead of creating separate executors for each event type, you can use recordTrigger() to handle multiple events in a single executor. This is useful when the response logic is similar across events.
Update executor/notify-project-completion.ts to also handle project creation:
import { createExecutor, recordTrigger } from "@tailor-platform/sdk";
import { project } from "../db/project";

export default createExecutor({
  name: "notify-project-changes",
  description: "Send Slack notification on project create or status change to COMPLETED",
  trigger: recordTrigger({
    type: project,
    events: ["created", "updated"],
  }),
  operation: {
    kind: "webhook",
    url: () => "https://hooks.slack.com/services/YOUR_WEBHOOK_URL",
    headers: {
      "Content-Type": "application/json",
    },
    requestBody: async ({ event, newRecord, oldRecord }) => {
      if (event === "created") {
        return {
          text: `📋 New Project Created: ${newRecord.name}`,
        };
      }

      // event === "updated"
      if (newRecord.status === "COMPLETED" && oldRecord?.status !== "COMPLETED") {
        return {
          text: `🎉 Project Completed: ${newRecord.name}`,
        };
      }

      return null; // No notification for other updates
    },
  },
});
Key differences from single-event triggers:
Single-event (recordUpdatedTrigger) | Multi-event (recordTrigger) | |
|---|---|---|
| Import | recordUpdatedTrigger | recordTrigger |
| Events | Fixed to one event | Pass events: [...] array |
| Args | Always has oldRecord + newRecord | Use args.event to narrow the type |
| Use case | Simple, focused handlers | Shared logic across create/update/delete |
The event field on args is typed to match the events array you pass, so TypeScript will narrow correctly in if (event === "created") branches.
Next Steps
Learn more about executors:
- Executor Service - Complete executor documentation
- Trigger Types - All available trigger types
- Operation Types - Different operation kinds
- Schedule Triggers - Create cron-based executors